It’s officially Spring!! And thank goodness it feels like it here in Nashville. When we lived in Minnesota it would be another month until we saw the grass or actually felt like we could put our parka’s away. But I’m so happy that we’ve been nearing the 70’s here because I need this warmth in my life!
This month has been a doozy for us, some stuff you’ll just have to wait to see 😀 but lots of exciting stuff! We’re also planning for our big trip in just a few weeks that we are both so pumped for. We had to reschedule it last year because of the pandemic and feel like right now it’s the right time and know we can do it safely. It is going to be beautiful, and exhausting, but oh so worth it! I’ve included some things that I’m shopping for at the bottom of the post, mostly for the trip but also just some spring fashion too.
BESTSELLERS
MY FAVORITES THIS MONTH
TOP POSTS OF THE MONTH
THINGS I’M SHOPPING FOR IN APRIL
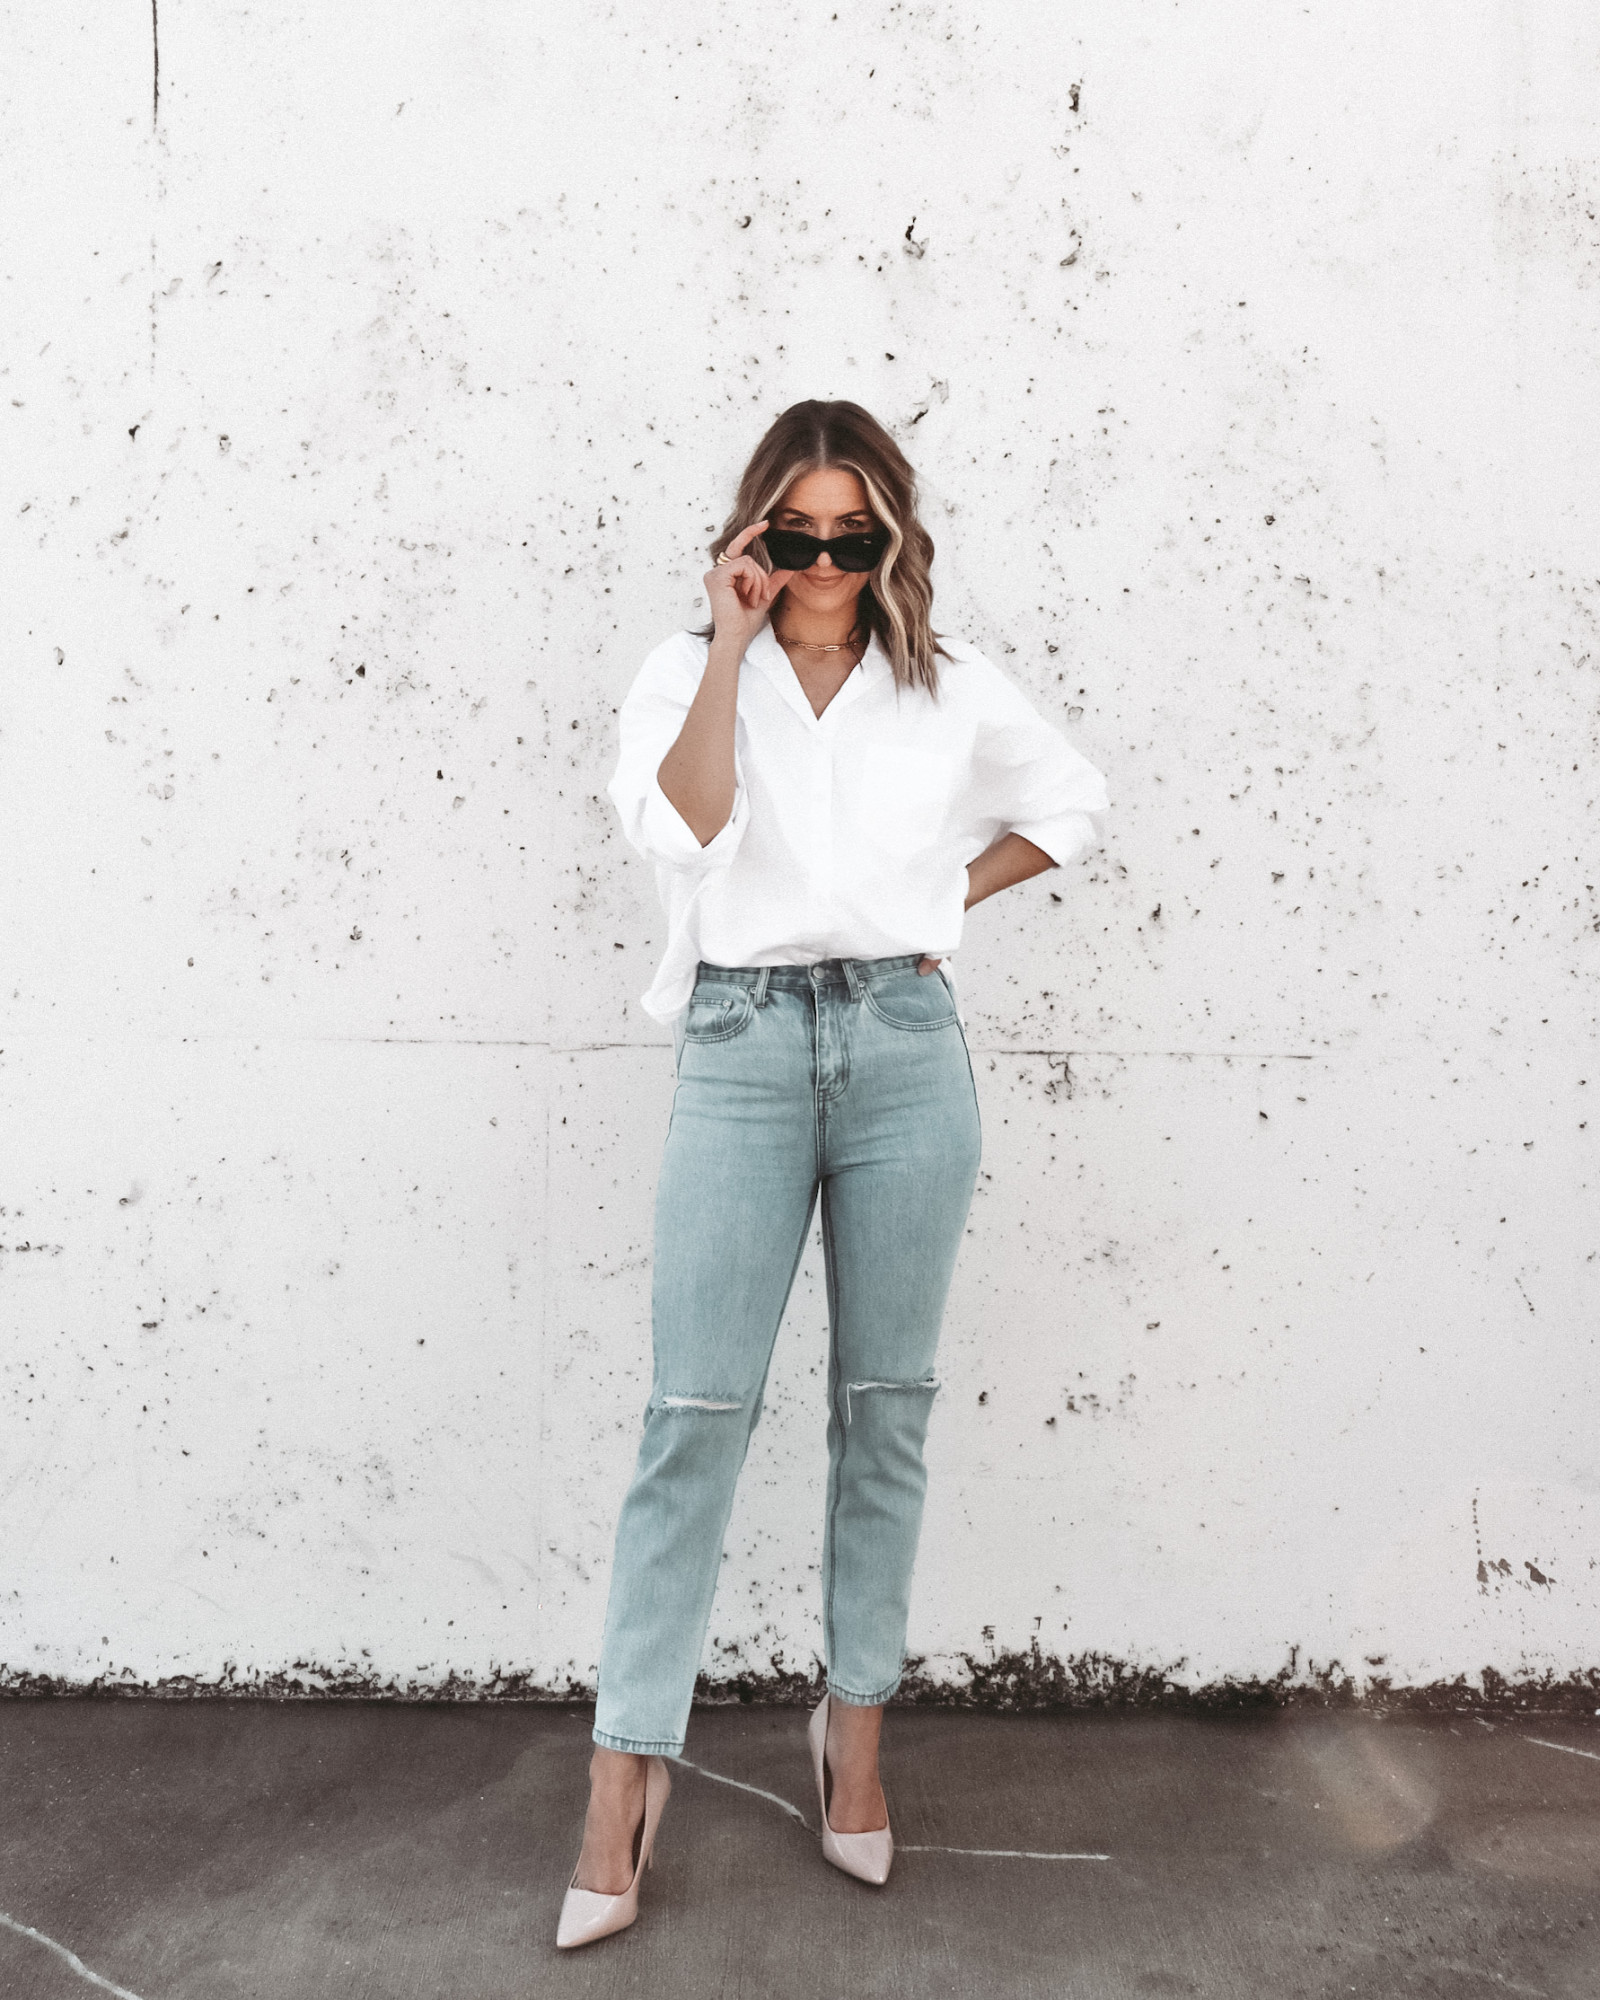
We’ve got a big and exciting trip coming up that we originally had planned last summer but had to cancel. So now we are in full prep mode for our trip in two weeks! Lots of hiking and outdoor time, so I thought that I would share a few things that I’m getting in preparation for the trip, as well as a few spring styles that I currently have in my cart.
I’ve seen this quote floating around social media and I have to say, I’m really feeling it.
How can this month be March, when last month was also March?
And it is so freaking true. One year ago this week my husband and I were sitting in the basement of our hotel waiting out a tornado getting ready to get our keys to our new apartment. Fast forward and we’ve moved into another apartment, got into interior design and well, still confused that it isn’t still March 2020?
Luckily my reading is still going as strong as this time last year! Check out my most recent reads below and keep an eye out for a post reviewing the first 10 books of the year!
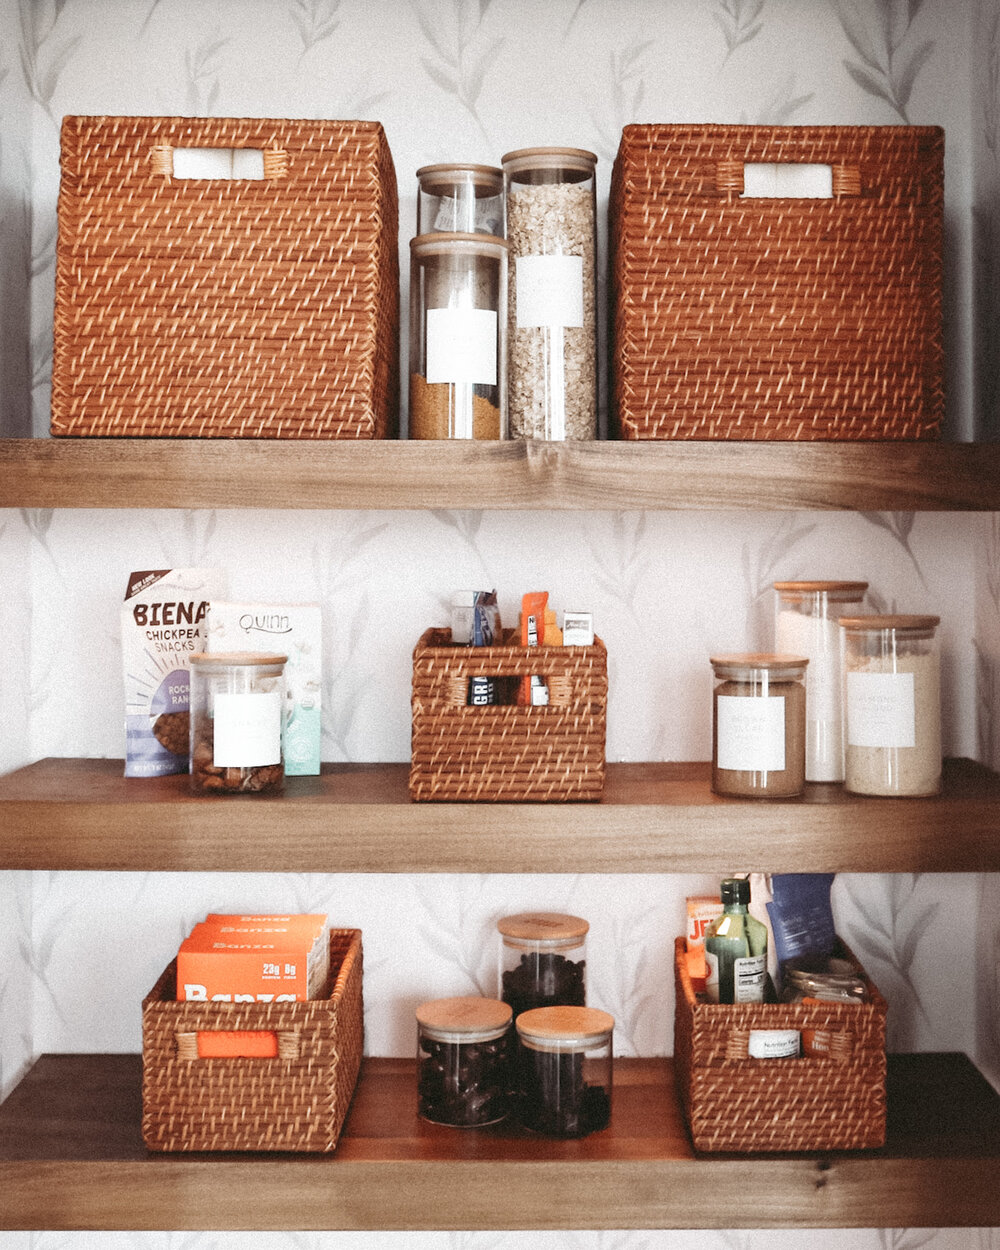
Oh my goodness I was so excited about this project! I absolutely love our pantry back home in MN so when I realized that the closet in our apartment just had several of those white wired shelves, I wasn’t insanely excited. But then I started doing some research and found some great ways to temporarily and affordably upgrade the space that wouldn’t hit our security deposit when we leave.
BEFORE
I knew I wanted the space to be pretty + functional, so the first thing that I wanted to do was brighten the walls! And obviously being in an apartment that wasn’t really a possibility. So when I found Livette’s Wallpaper I was ecstatic! It is removable, peel & stick which is a renter’s dream come true. They had so many amazing designs that to be honest I had a hard time picking. Which, I guess is a great problem to have! Not only was it incredibly easy to use, but it totally made the closet feel brighter and immediately styled it up.
I still can’t get over how easy it will be to take it off when we leave either!
The second component are the DIY shelf covers, which I think are great for any ugly shelves. They look like reclaimed wood floating shelves and again, completely uplift the style of the space. And I’m not sure if it’s just me, but I always find that with the wire shelving, things fall into the grooves and tip over time to time, so this completely eliminates that issue. I used English Chestnut stain because the plywood that I got had an orange tint to it so any lighter stain wouldn’t come through that great. Maybe I’m just obsessed with his color after this side table or something, but I think they look great!.
SHOP THE TOOLS
Now comes for the accessories, which any woman knows can be the most important part to an outfit.
Not many closets have appropriate lighting so I found these from Home Depot and I’m so excited about them! They run on batteries and work on a remote so no worries about hardwiring. There are some great ones from IKEA as well, but those required a plug and we didn’t have a socket in the closet and didn’t want to deal with hiding the wire.
Baskets are like, my jam! And if you don’t have many different storage spaces, you can use baskets to put some categories in the baskets and keep it from feeling disorganized. Things like paper towels, maybe extra boxes of trash bags, or other home items that might not traditionally be found in a pantry.
Jars on jars on jars 😀 IKEA has some affordable jars that can upgrade your pantry, and sure you might think that it is a little extra to put your snacks etc into jars and take that extra step. But you know what? It is totally worth it to open up the pantry door, and know exactly what is where and not see a bajillion different plastic bags. And let’s not sleep on these labels! My goodness are they beautiful and again, organized!
I had such a strong year of reading in 2020. That was one of my New Years Resolutions and I put a specific goal of 40 – 50 books on it and I am happy to report I read 45! I didn’t end the year on the strongest note, but I’m still pretty happy with it. I’m going to try and get back into the flow of it for the beginning of this year and I have some amazing books sitting on my nightstand waiting for me!
Throughout the year though I found some amazing sources for these book recommendations! I now follow @bookofthemonth and @reesesbookclub and love both of their recommendations! But I also love reading everyone else’s recommendations! The New Yorker wrote an article about the books they read in 2020 that I took some notes from, and Refinery 29 writes a lot about reading more, ways to read more, and the books that they have read so I would recommend following them on social and checking their site every now and then!
Now, if you’re like me you love reading, when the reading is good. But when I start a book that isn’t good, I have such a hard time continuing to read. I hate just putting a book down and giving up on it, but I also could go weeks without reading anything at all because of that book. Sooooo I want to make sure that if a book isn’t really all that great, but the reviews and everything say different, that I share that with you all! Now, my opinion obviously isn’t law. But if you were on the fence about a book, then maybe that’ll help your decision. So you can check out some of my posts on the books that I have read that include their reviews and my thoughts, but I also do a quick review the second I finish a book in my stories as well!
Now check out some of the books that I have on my list to read this coming year! Unfortunately some of them are books that I didn’t get around to reading this year, so I’m going to tackle those first so I don’t have them hanging over my head. But either way, I’m super excited about diving into all of them!
For a few weeks I’ve been doing a round-up in my Instagram Stories every Sunday; things like my favorite new people to follow, bestsellers, my new finds of the week, most asked questions, etc. So I thought that I would do something similar on a monthly basis. Not only bestsellers, but also some of everyone’s favorite posts of the month, maybe a favorite reels of the month! But also maybe some things that I have found/learned over the weeks. We’ll see how this evolves, and if you have any requests or suggestions to include, please leave a comment below!
One thing that I have LOVED about the last few months, actually, is that my love for DIY projects has been shared with all of you!! It makes me so excited that something that I just geek out over is something I can share with everyone. And while I am now in a small apartment so that makes things a little more difficult, I can still plan some and knock them out at my parent’s house when I go visit! Also, my mom has all the tools ;-D But I was so excited about the final product of this side table because, to be honest I wasn’t sure how it would stay together because unlike other projects I didn’t have anything to model it after. But it was so easy and required so little tools that if you are in an apartment you could totally do this one too! You can check out the details in my reels, as well as shop the details below.
If you can’t tell, I’m a planner, in life. I love to plan my days, my weeks, my living spaces, etc. so when we moved into a new apartment where we had to start from scratch I started planning immediately. And these plans have changed sssooooooo much over the months, we were originally supposed to move in in June and if we had our place would look very differently if we did!
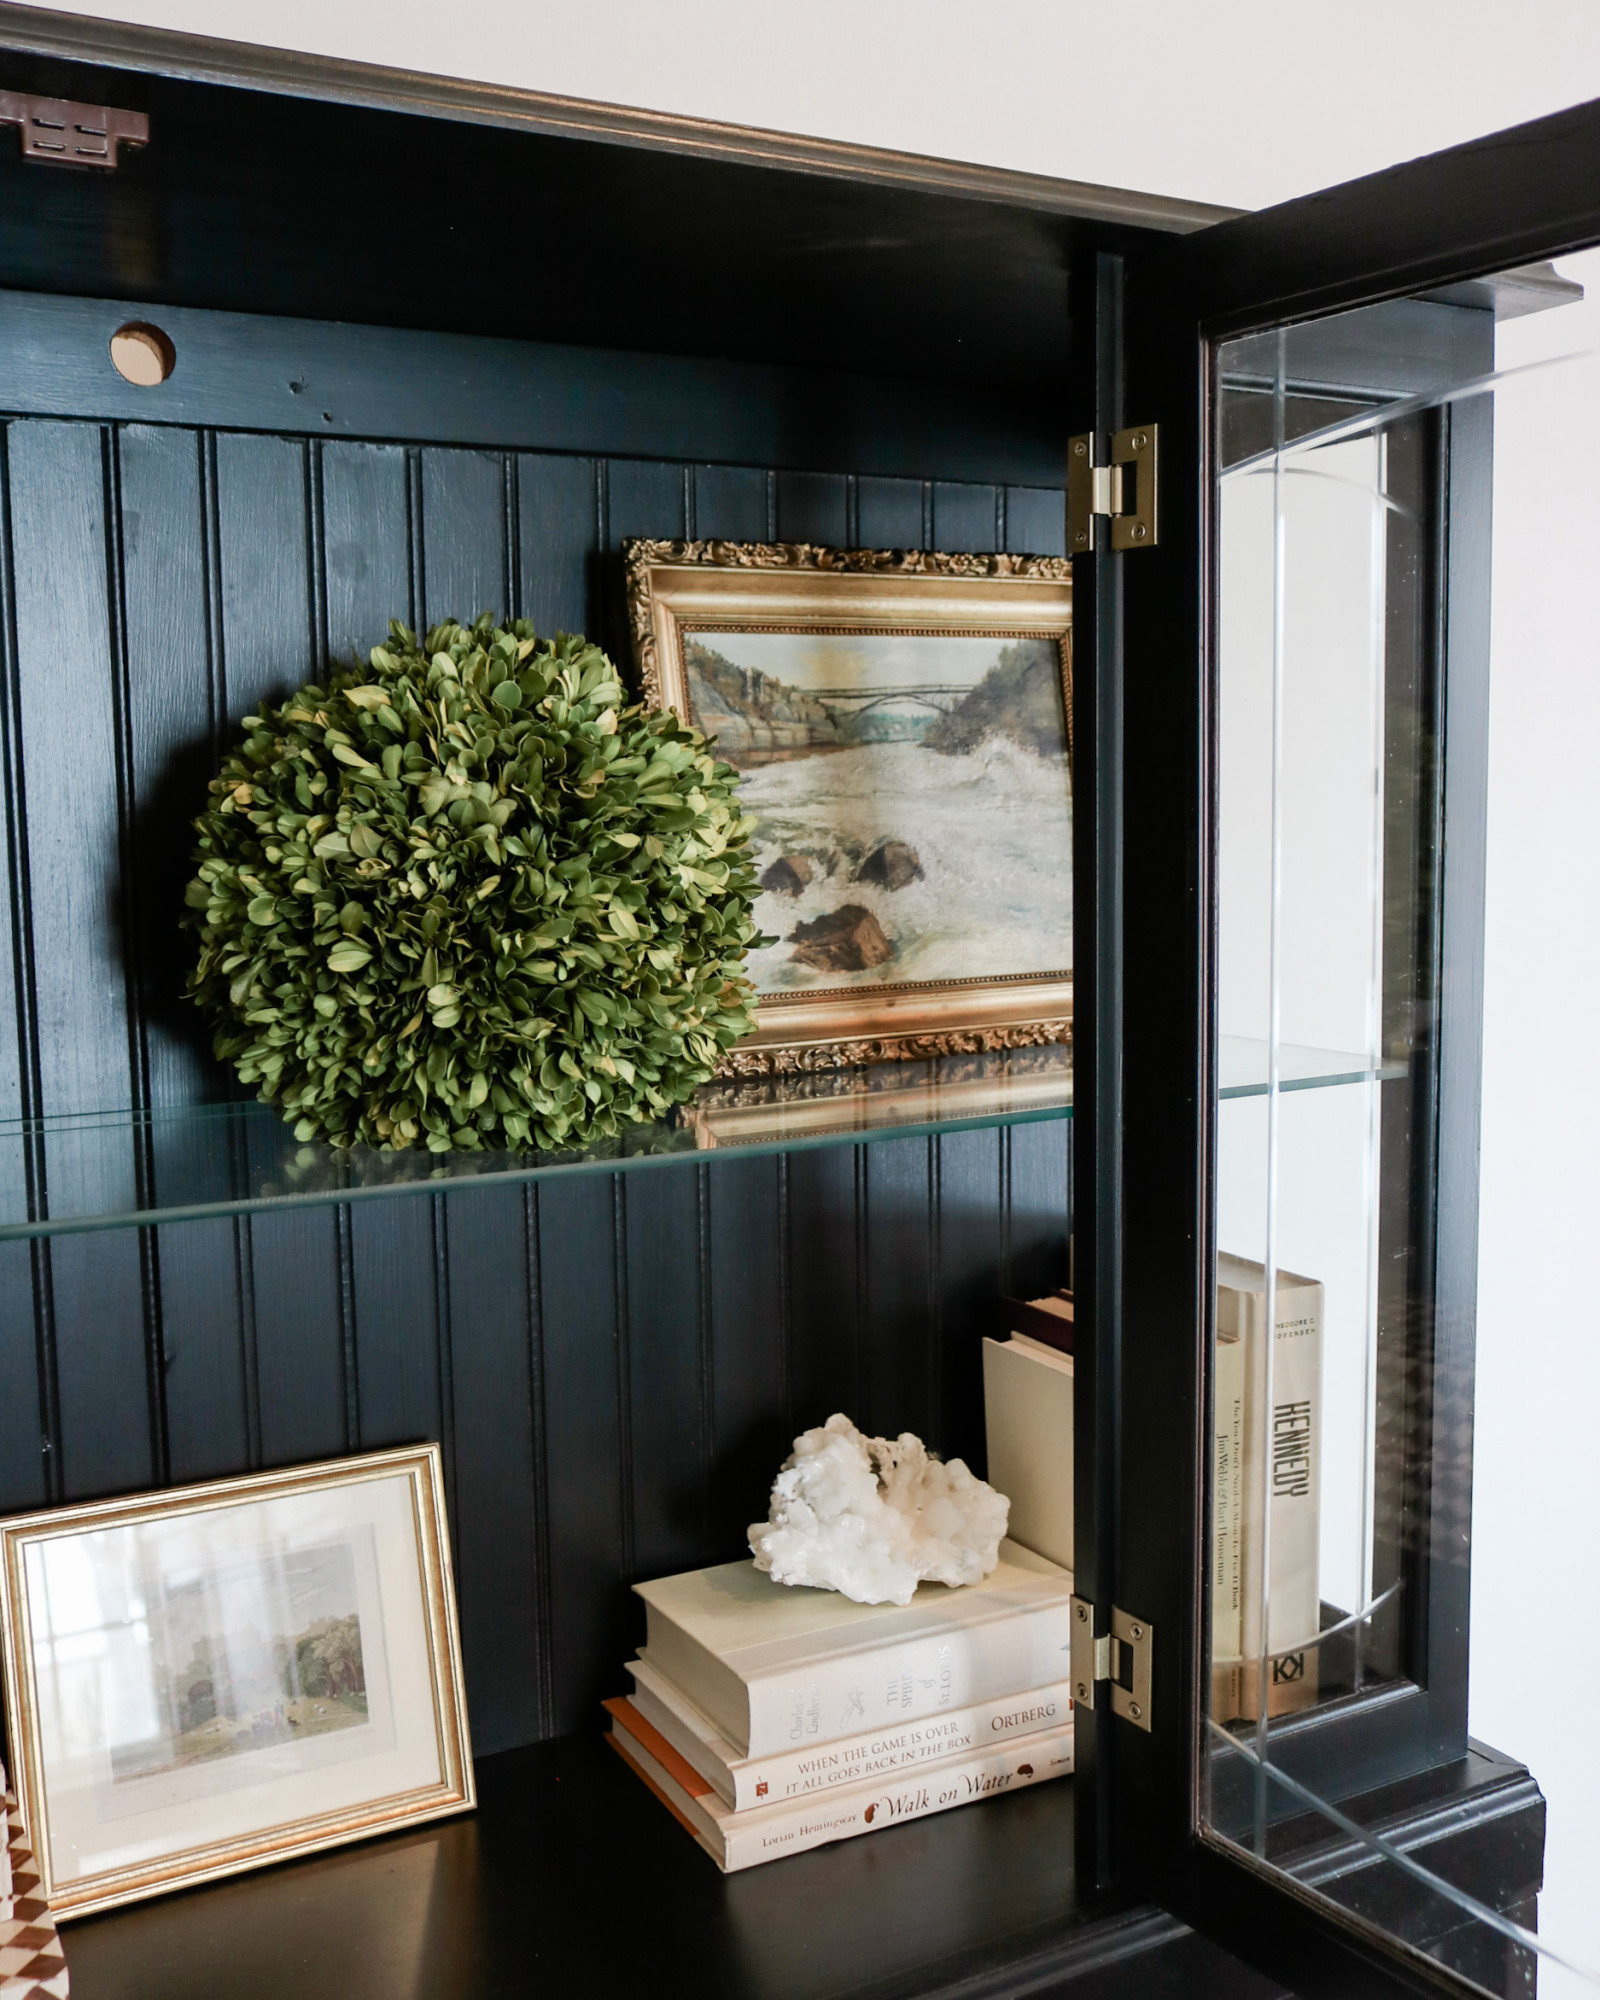
I originally thought that super light and fresh was what I wanted: all whites and light neutrals. But over the past few months I have loved playing with dark and moody colors. Plus, my husband isn’t the cleanest eater in the world :-/ Now we already had a few pieces so I had to find a way to include these darker and more colorful pieces, which to be honest is the best way to do it! If you don’t want it to be a super moody room but still want hints of it, the details to top it off are the perfect place to do it! Meaning, a top-layer rug, throw pillows, maybe a coffee or side table.
Our living room is obviously going to be the most-used room in our apartment, and I’m sure it will even change from the design concept above seeing as I have about 7 rug swatches sitting in front of me right now 😀 But our living room has so much natural light that I knew that having a darker rug and accents wouldn’t make the space feel overly moody. That’s something to really keep in mind when picking colors and hues. If you want some color and mood, but don’t want it to be overwhelming, consider how much light the room has as well as the height of the ceilings! Lower ceilings and minimal natural light are features that immediately make a room darker/moodier already. So since our ceilings are 12’ and we have floor to ceiling windows, I wasn’t too worried about these features being too dark.
Still thinking over the light fixture though, we might have to wait a while and live in the space until we pick that one.
We do have two bedrooms, but unfortunately for future guests, that second bedroom is not for you. We needed a dedicated space for a desk and in-home workouts, so that’s what this bad boy’s gonna be! We also know that since we’re in a much smaller space from our house in MN, and quarantine isn’t quite over, we need other spaces to be able to escape to: a comfortable bedroom to hang out in, a functional kitchen table, maybe a reading corner to change up the scenery.
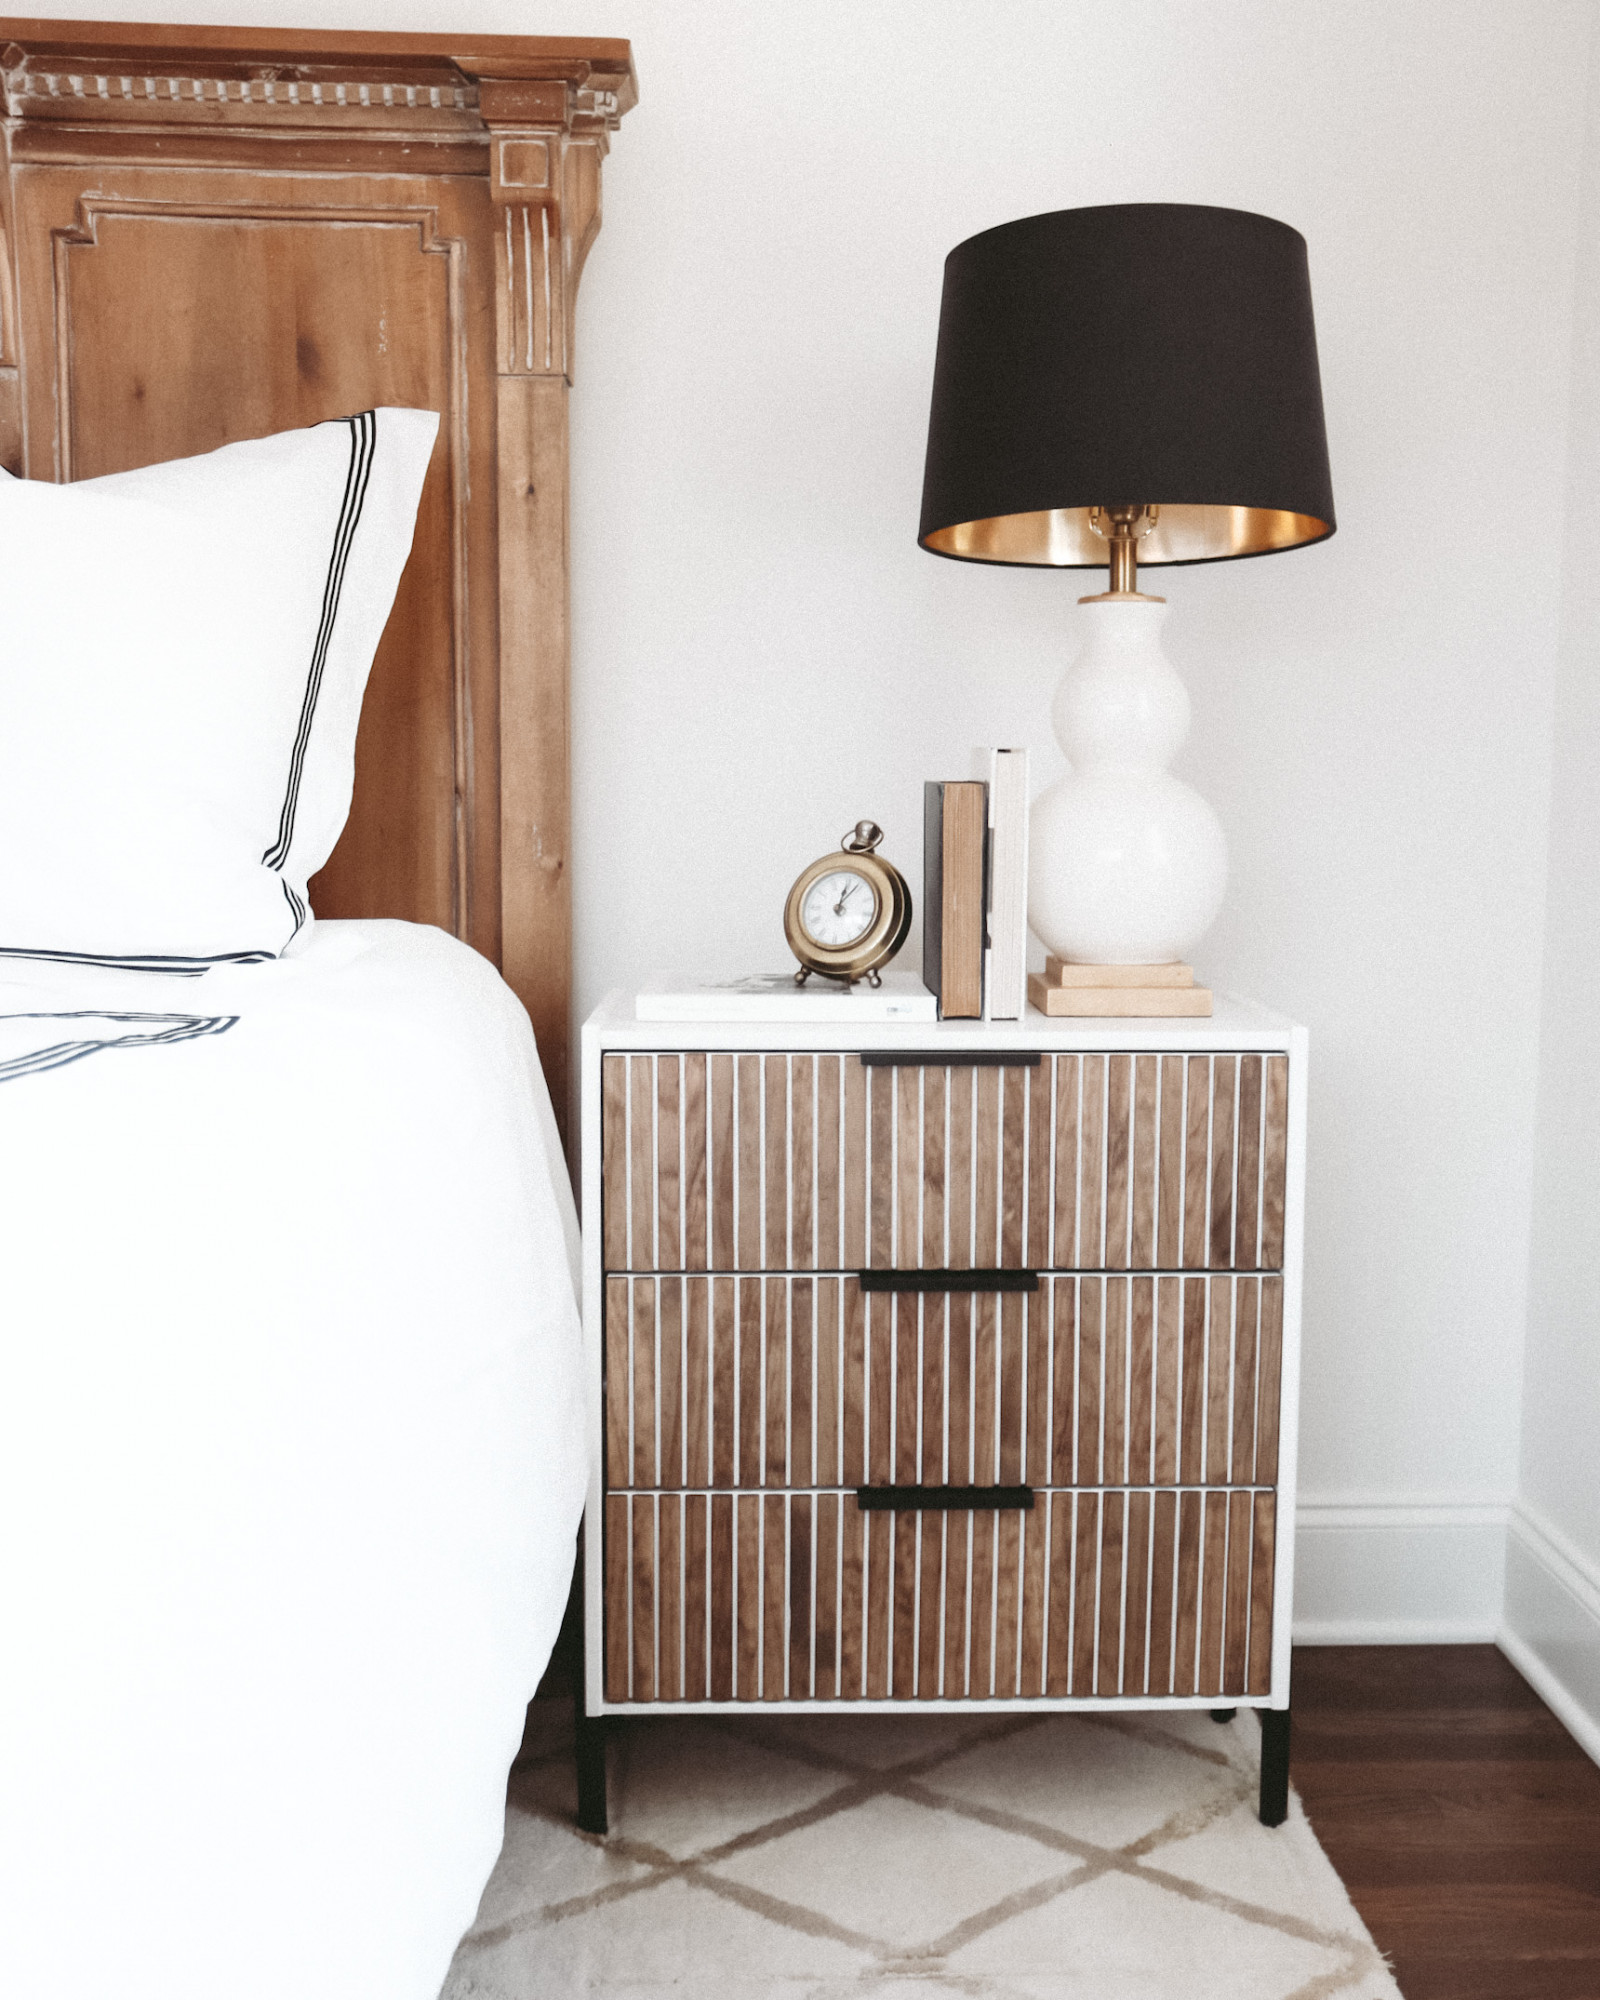
I started with the linens in the bedroom. While I already had the headboard from Target, I wanted the linens to make it feel stylish and comfortable. I think people minimize the importance of bed linens and that is a huge miss! Linens can completely change the feel of your bedroom, and check out some of my picks and finds below.
Also don’t assume you need fancy nightstands for a nice bedroom. I got ours from Amazon and changed the hardware. If you don’t need a drawer or want a minimal look? Consider an open side table or floating shelf! That’s a great way to add some style to your room.
I’m also super excited about our entryway. I really like how you can turn a small and otherwise empty space into a totally functional and stylish corner. Entryways are actually the best area to do just that! You can get creative not only with the artwork and maybe wallpaper, etc. but with hooks and shelves too! We have a rather large entryway for an apartment so we’re lucky enough to have the space for some items, but it’s key not to overdo it. Sometimes doing too much with a space just because you have the room for it can undo any aesthetic goals you have.
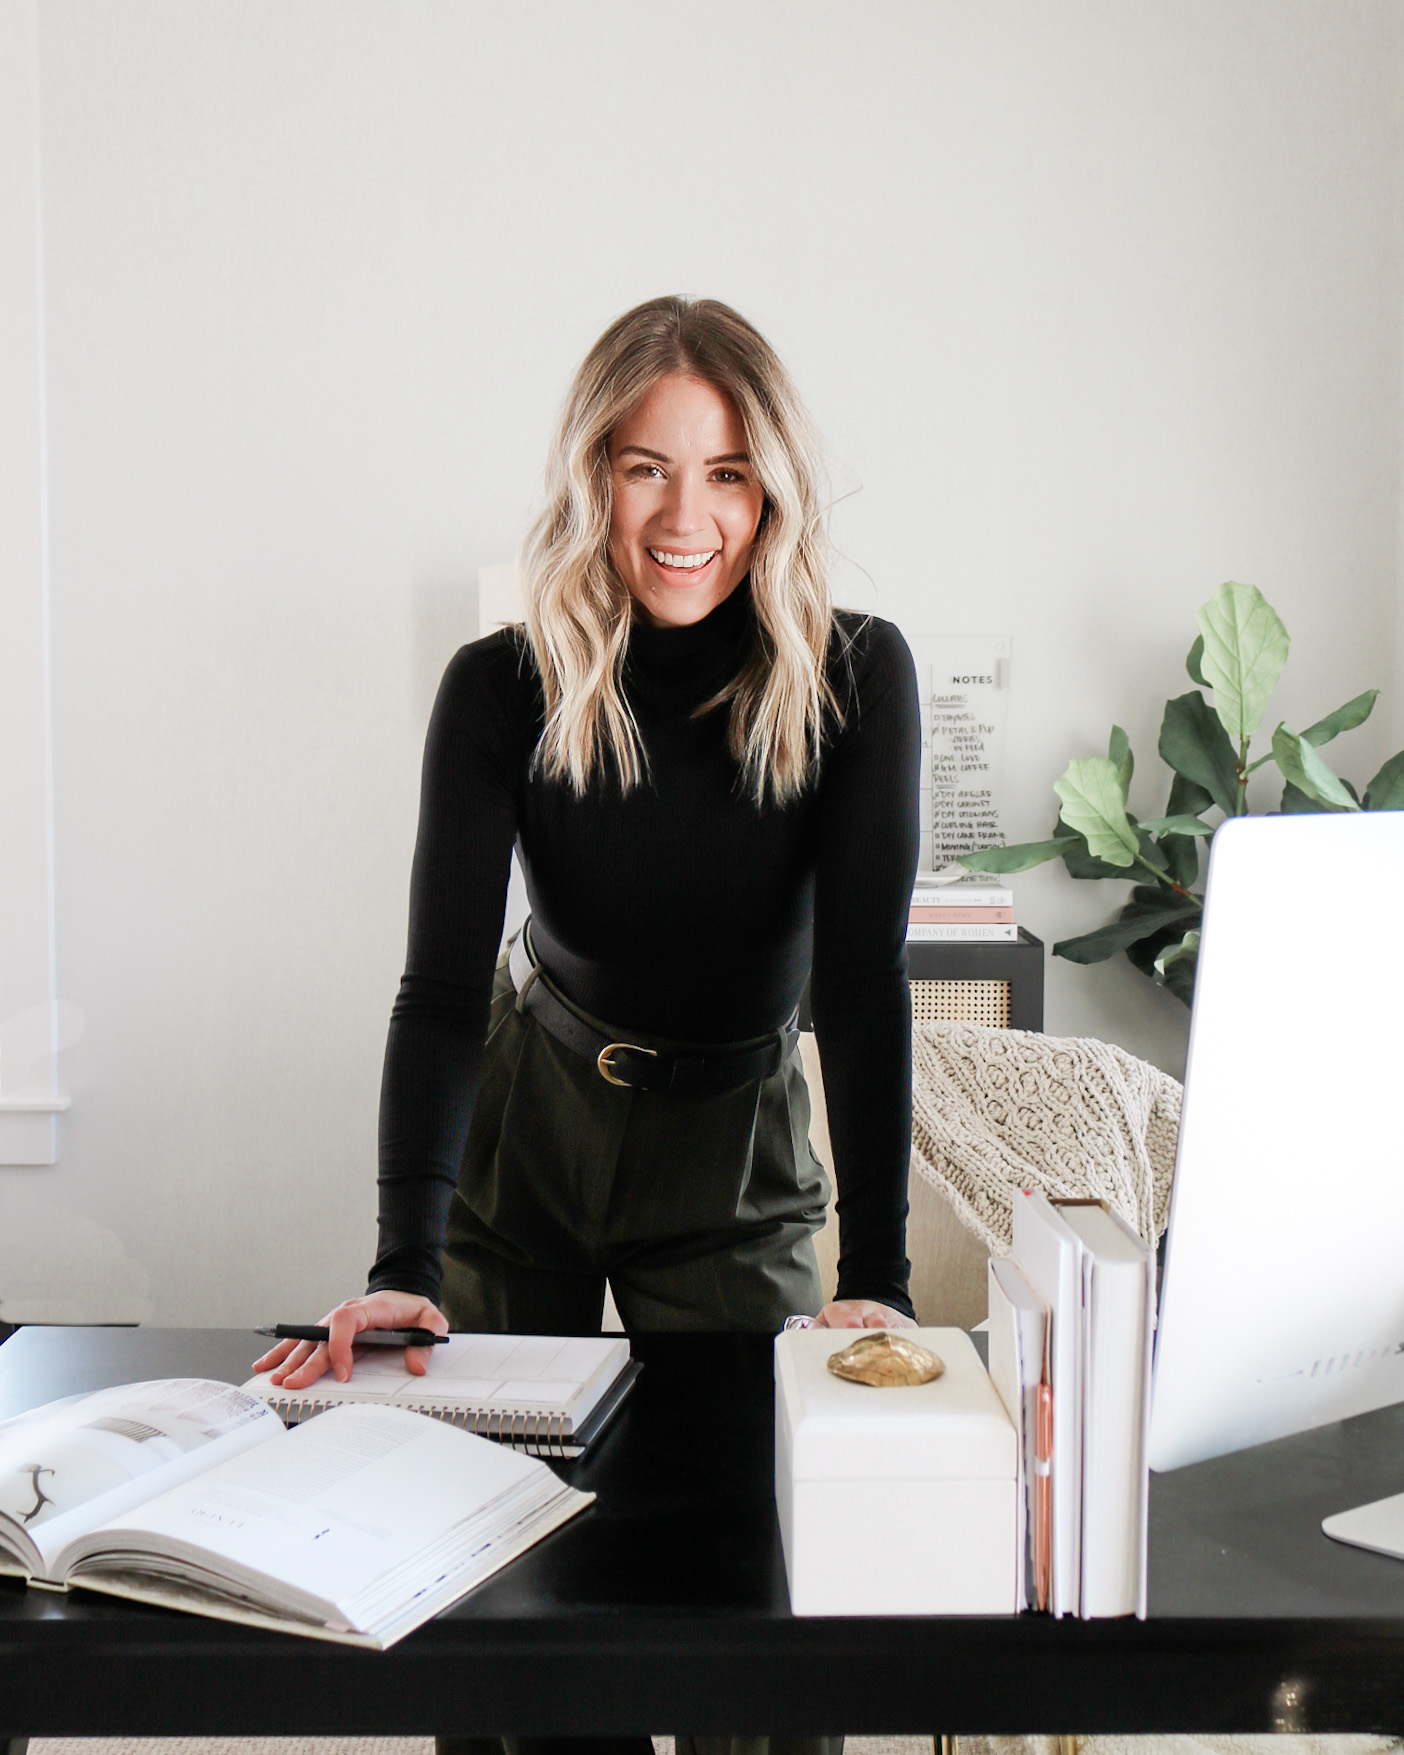
The office plans are super bare bones and to be honest because that space is going to be so multi-functional I think that the majority of the pieces of that room are going to be small organizational tools to keep that small space feeling uncluttered. I’ll share more on Instagram as it comes to life!
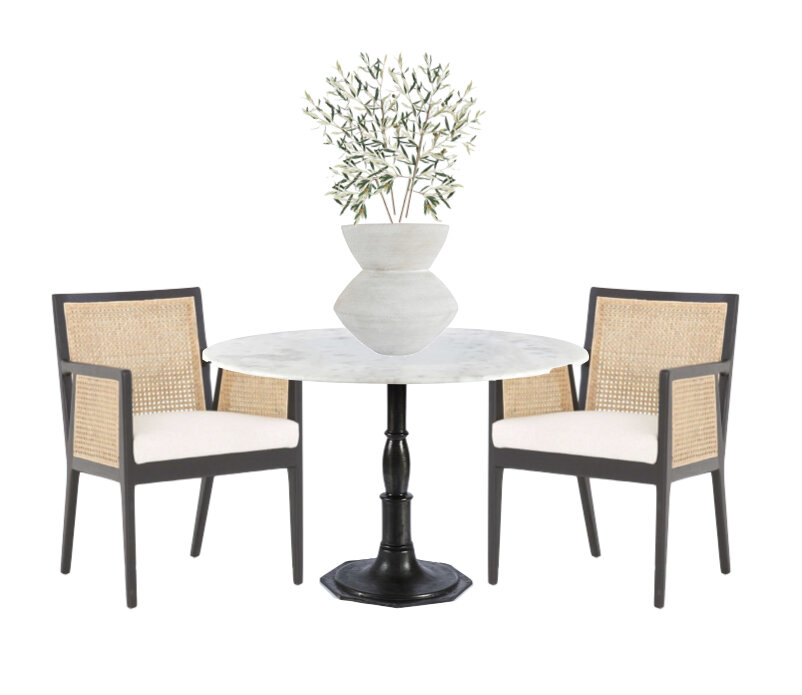
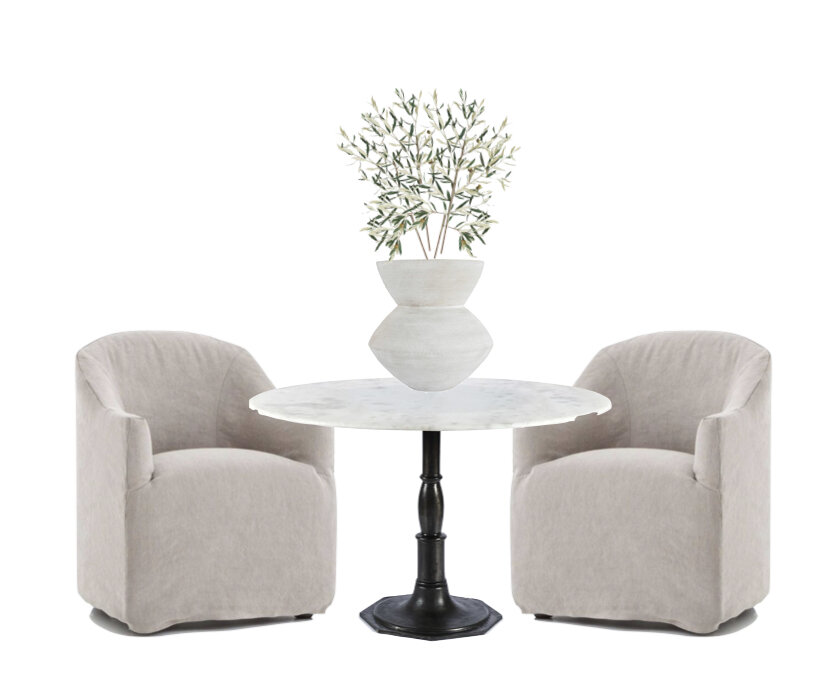
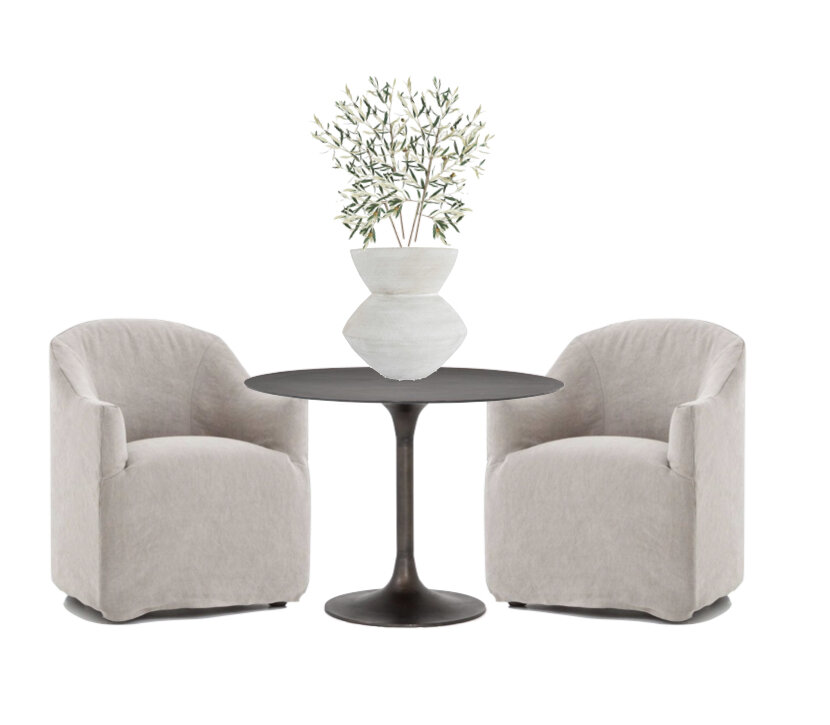
I keep changing my mind like crazy on the kitchen table!! At first we were thinking that we would forego a kitchen table, but other than the living room and office it would be the only other place to sit! So since we are spending 99.999999% of our time at home these days, we figured we could use the extra functional design. All I know is that I really want an industrial looking table, round, and comfy and casual/farmhouse slip covered dining chairs. These are the top three variations I have right now, but check out the links to some of the items below too!
I’ve been in major DIY mode! I’m sure it has something about being stuck at home all the time and wanting to redecorate, constantly. But I started scouring Instagram a few weeks ago with easy and small DIY projects that would be a fun way to decorate the house here and there.
MUD PLANTERS
If you haven’t been following Bre Bertolini on Instagram, then you’ve been missing out! You’ll probably immediately recognize her mudroom because it has been circulating social media for years! And she has some great DIY projects that anyone can do, like these planters. She actually used this method for a lamp base, but I thought this would be a cool look for some small vases for herbs in the kitchen. I loved the shape of these terra cotta vases that I got from a greenhouse in town here in Minneapolis, but the color was a little off from the rest of the room, so I followed her tutorial step by step, except I did actually do a light coat of clear topcoat spray paint just to give it a little protection. The dried mud doesn’t smell at all, but obviously if you touch it or if it gets wet, that can be tricky and will mess up the “stone” vibe that the mudding gave it.
I might try and find a more permanent way to get this effect that doesn’t include getting mud all over the patio :-/ But these were fun and easy!
Hello, World!
or you can check these out too!
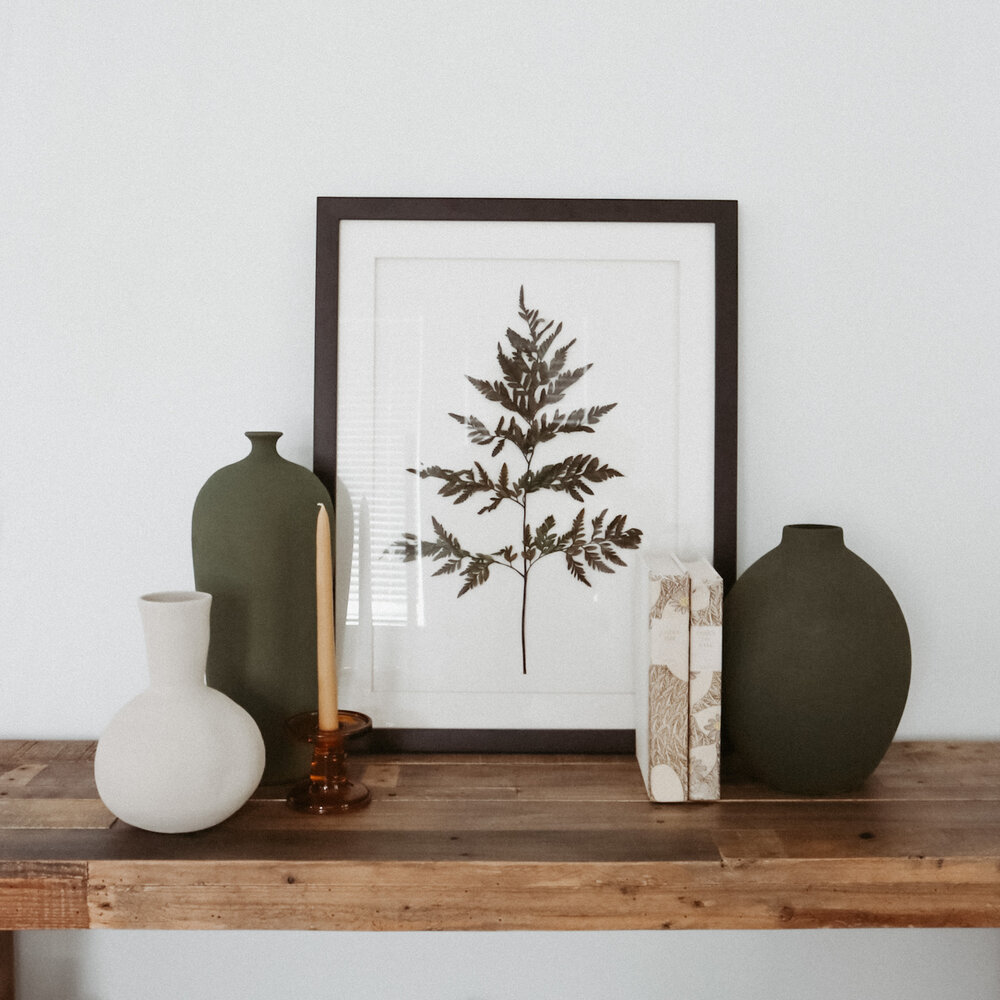
TEXTURED CERAMICS
A Minneapolis photographer that I follow posted her friend doing these and ohhhh my gosh I knew right away I needed to try it out!! I am obsessed with dark and moody colors for this fall, so this was the perfect way to get some decor pieces for fall and not spend a bajillion $$’s on a ton of new vases. I went to TJ Maxx and Home Goods and found a few great vases whose shape would compliment each other, then got the following colors from Sherwin Williams. I followed the tutorial here which is really quite simple: mix two parts paint and 1 part baking soda, adding more baking soda if you want it to be a thicker “paste”, then paint away!
or you can check these out too!
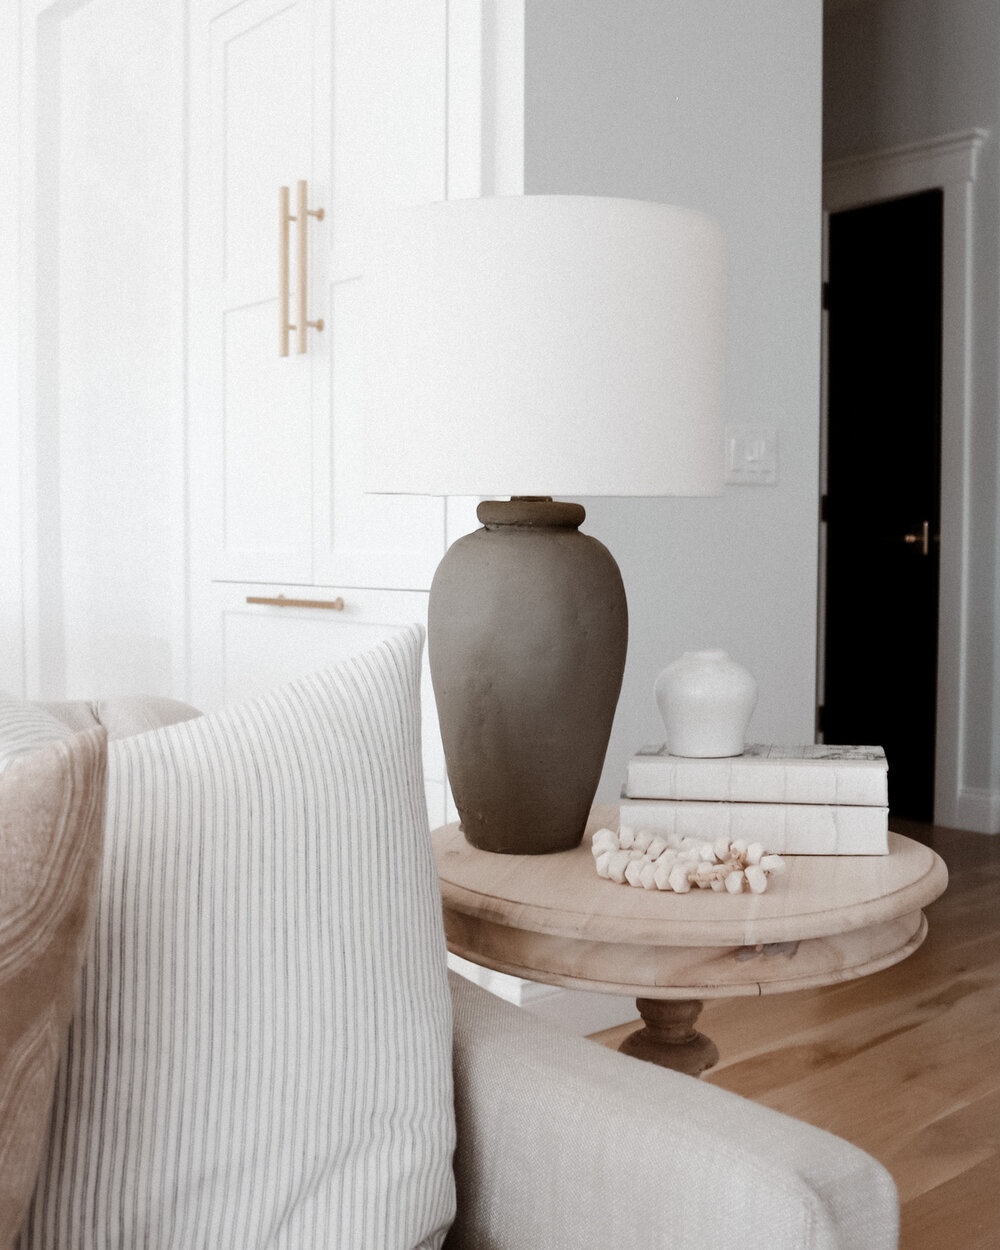
I combined the methods from the mud planter and textured vases to make this lamp! It had tons of grooves so I filled it in with plaster and finished it with a grey paint + baking soda mixture and got a stone-textured lamp!!
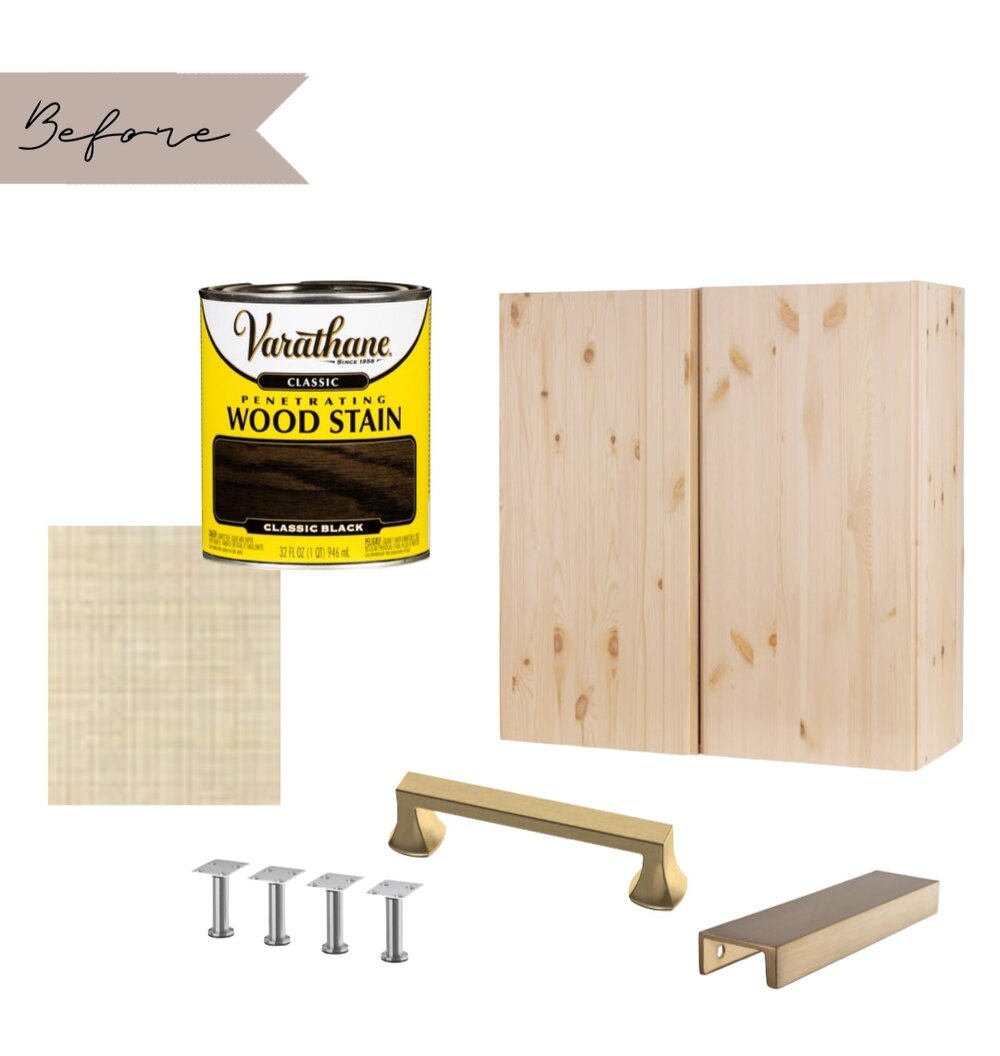
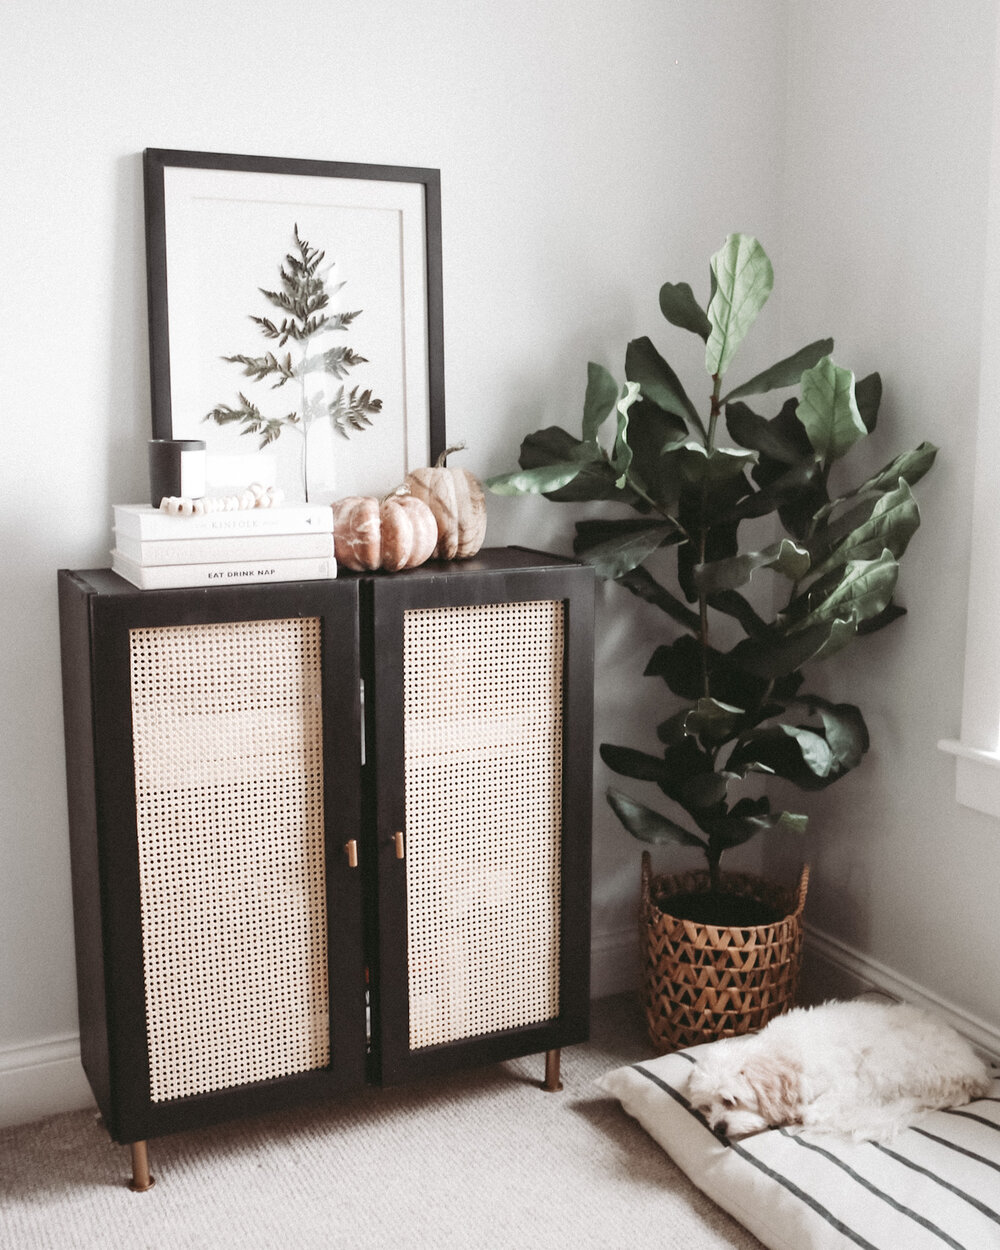
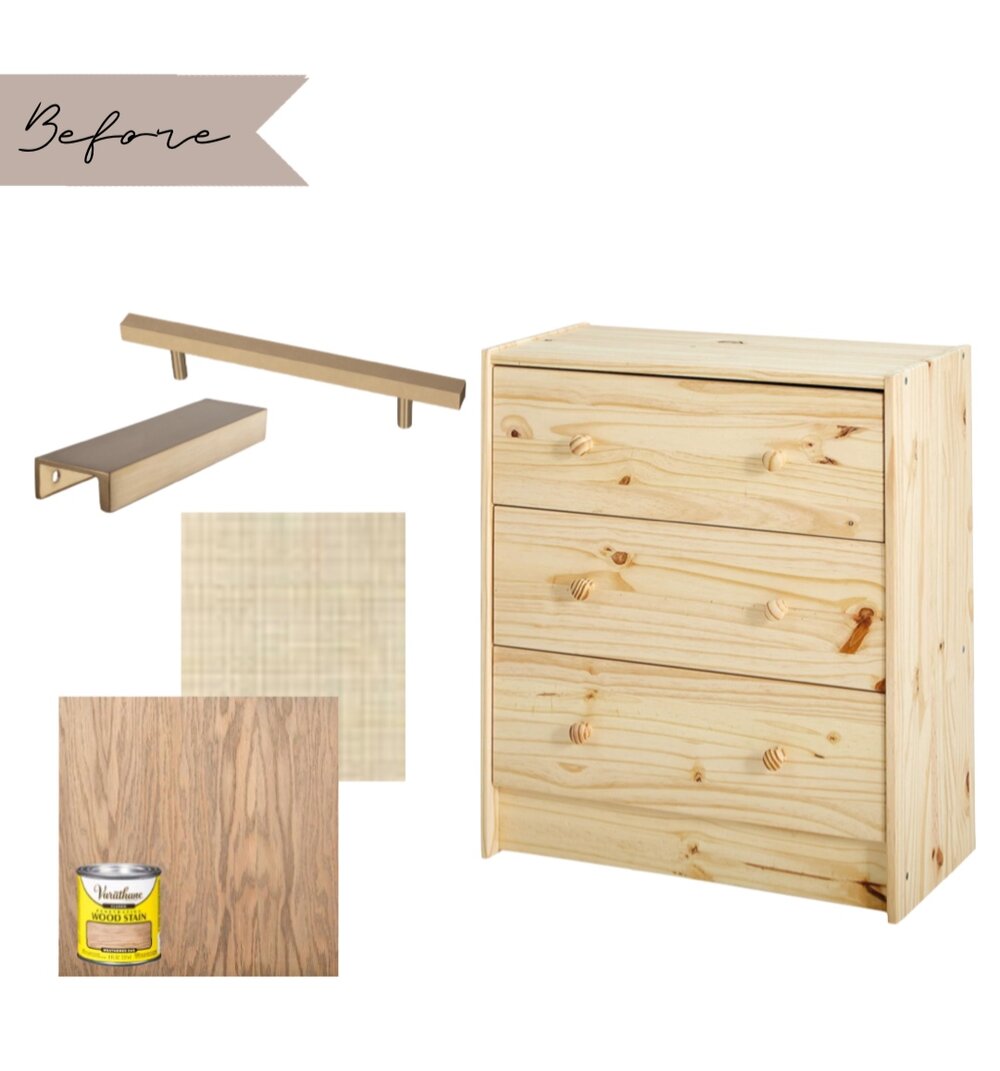
CANE DRESSER + CABINETS
So I was first inspired by @brepurposed and her IKEA desk hack, but to be honest the more that I thought about it and the more that I looked into her tutorial, it felt a little involved for me. I am lucky enough to have a mom and some friends that have wood cutting equipment, so I enlisted their help to cut the drawers and cabinet doors of these pieces below to get the effects that I wanted. By getting unfinished wood you are able to paint/stain however you want to, which is much easier than finding/cutting/affixing plywood like Bre’s IKEA hack. Her desk looks AMAZING! I just know that’s way out of my capabilities right now.
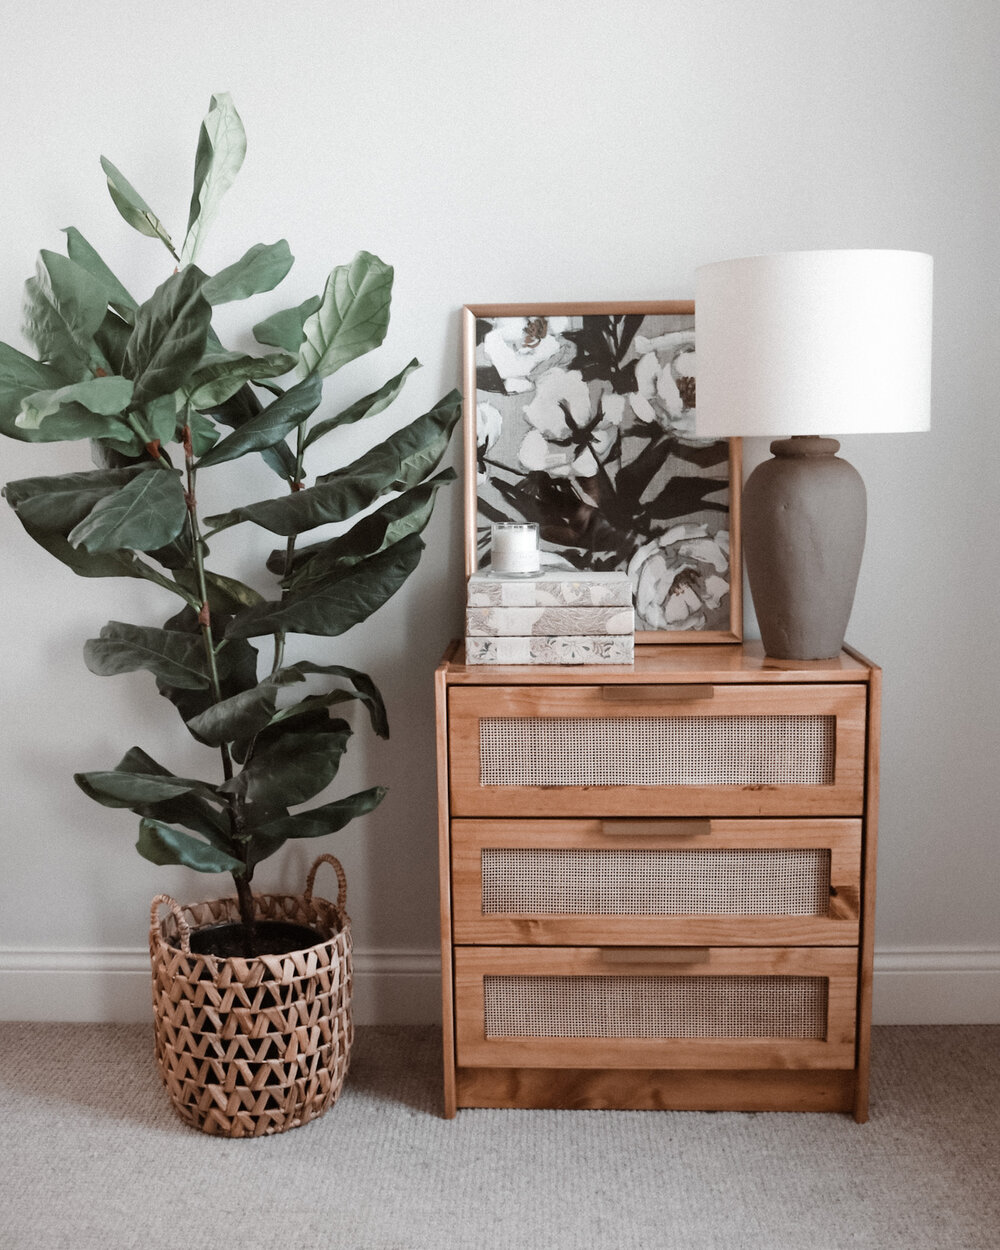
I got this dresser from IKEA which is only $40 and this cabinet is $70. The cabinet is actually a part of a shelf unit that you can put together, but I decided to buy some legs and make it a stand-alone.
I measured and marked the drawers/doors so that the wood would create a frame for the cane. After the wood is cut, you can stain all of the pieces the way that you want. I chose black because I love the contrast, but I also love the look of a natural stain too, more of a neutral vibe. You could also stain the cane if you wanted a more cohesive look and less contrasting colors.
Picking the hardware is really fun too! I love pretty much anything that is antiqued brass, and Home Depot has some great options, even Anthropologie has some cool finds too if you’re cool with spending a few more dollars.
or you can check these out too!
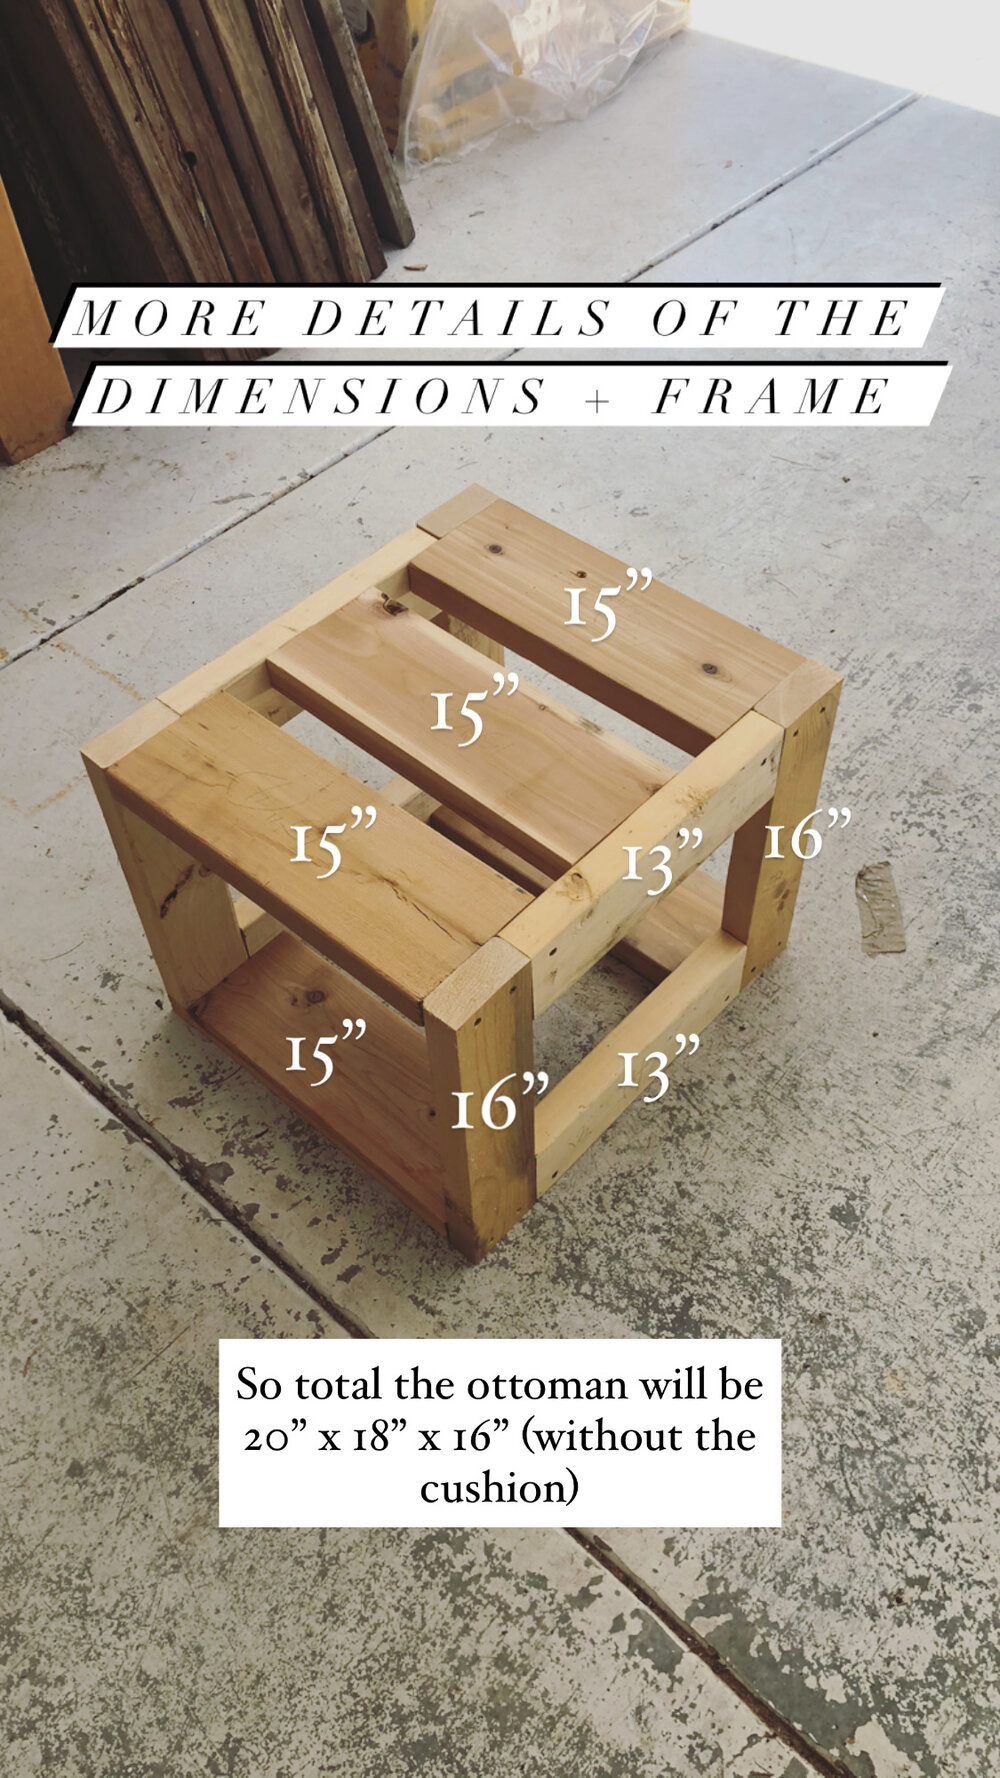
CANE + SHERPA OTTOMANS
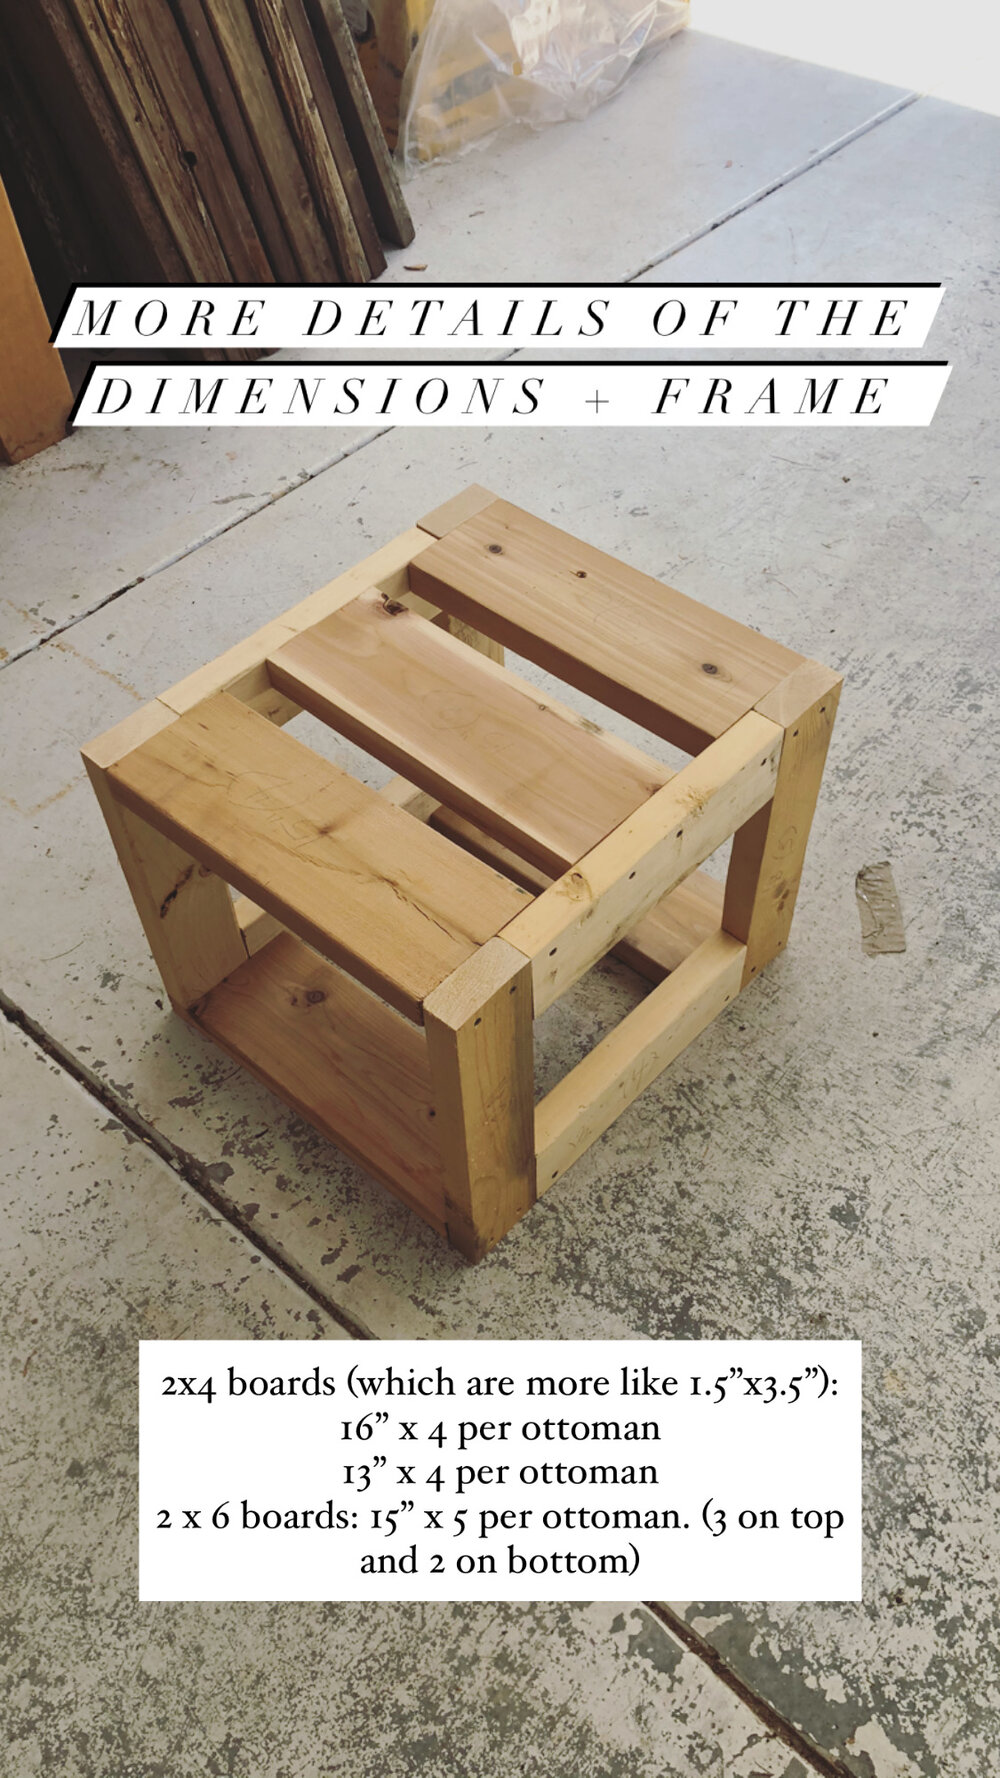
These almost deserve a post for themselves! And they were much more involved since I built the structure and everything from scratch! Below I included a picture from my stories that broke down how I built the structure and what dimensions I used. I kinda worked with what I had, getting the wood from my mom’s stash. But the really tricky part was when I cut the frame. This was put over the stapled cane for a super clean look, and of course it took me a while to find enough of the 1/4” poplar boards to cover both ottomans, and took even longer to cut them all down!
*what I learned: poplar is not the best for staining. The colors are so different with the boards and tend to blotch, so if you use poplar I would only use it when it’s being painted.
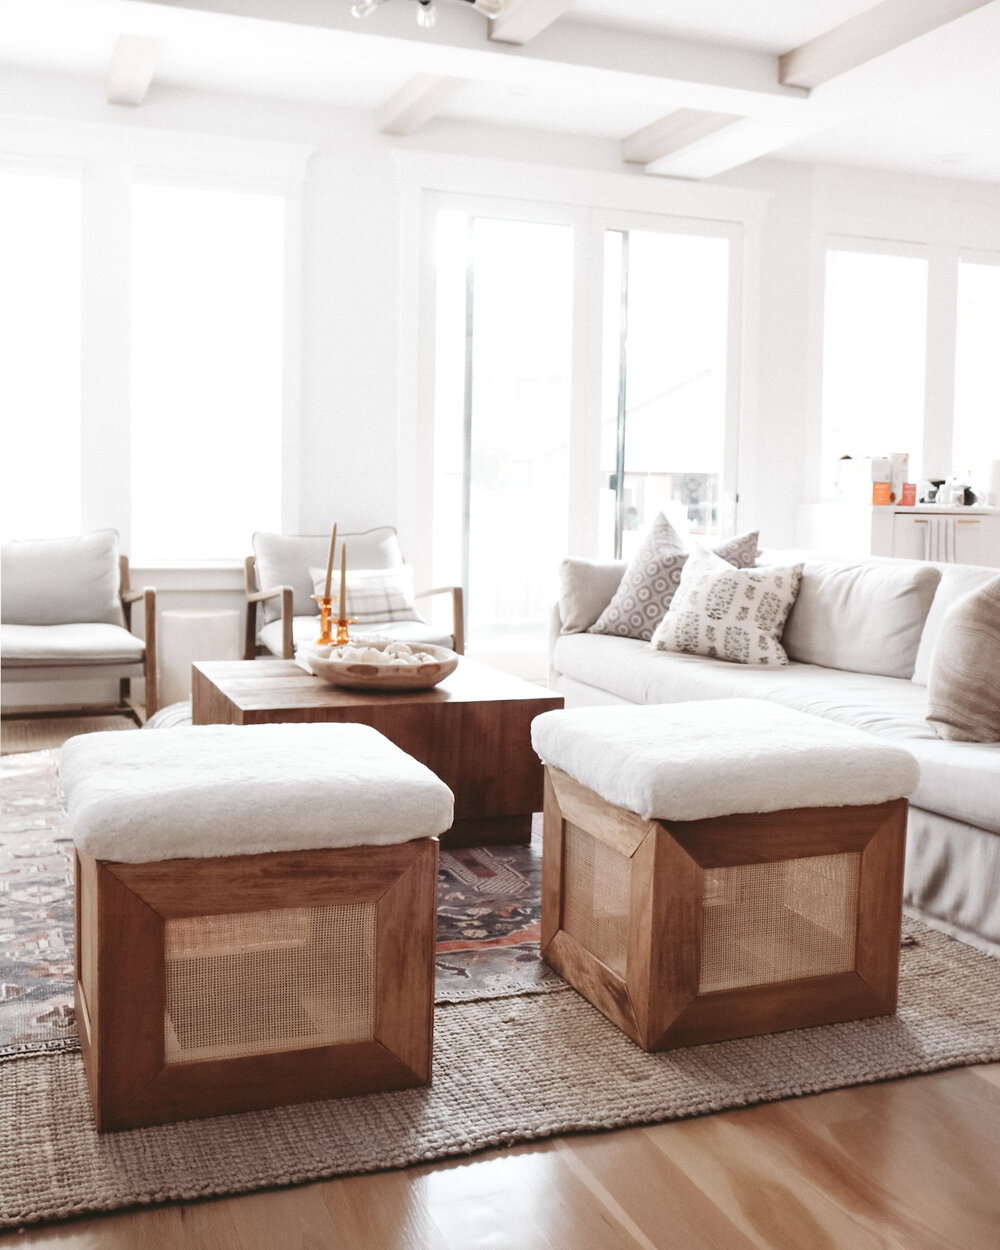
I followed Ria’s tutorial in her stories practically exactly when it came to making the cushions as well! The sherpa was on sale and I have to say it is ssoooo soft! I loved this pick! I layered batting underneath the sherpa to give it more cushioning and volume. I used scotch spray and it worked really well! Just be careful because it will get your work surface (and hands) sticky. For more info check out my DIY stories!
next up…
I cannot wait to do these frames for our apartment in Nashville!! There is an antique store down the street from us here in Minneapolis that always has great vintage prints that would be perfect for this! Not to mention there is cane in a few of the pieces of furniture that we have in there so it will be great to tie it all together. Check out Cynthia Harper’s Instagram too, she is where I got this idea and has some amazing other DIY ideas and overall amazing style.
I also have enough Cane left over to make a few of these trays! And these are gonna be so fun because I can play around with the hardware. Right now I’m going with these because they’re so fun, but simple brass handles could be great too.
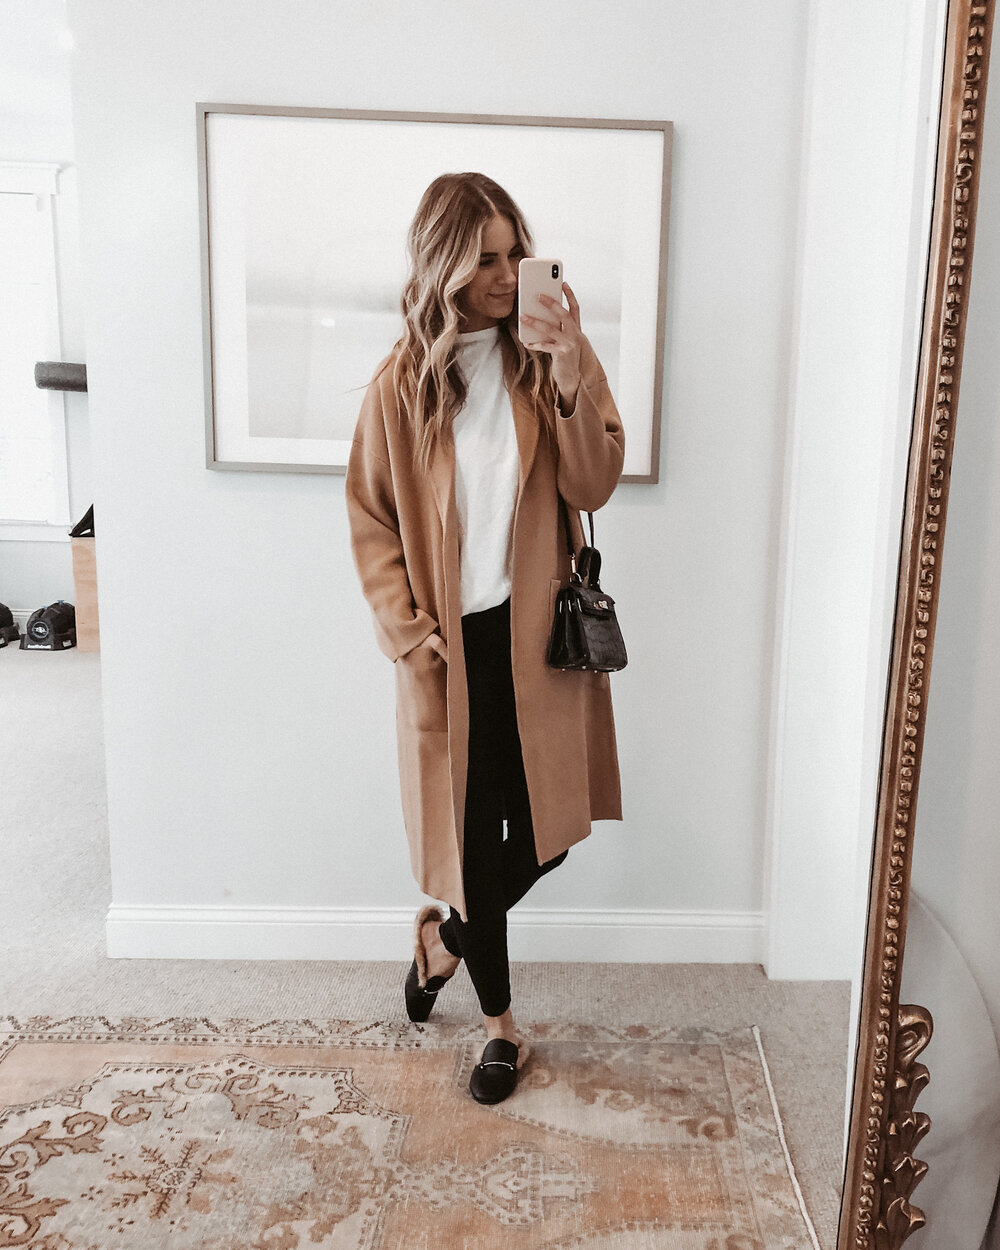
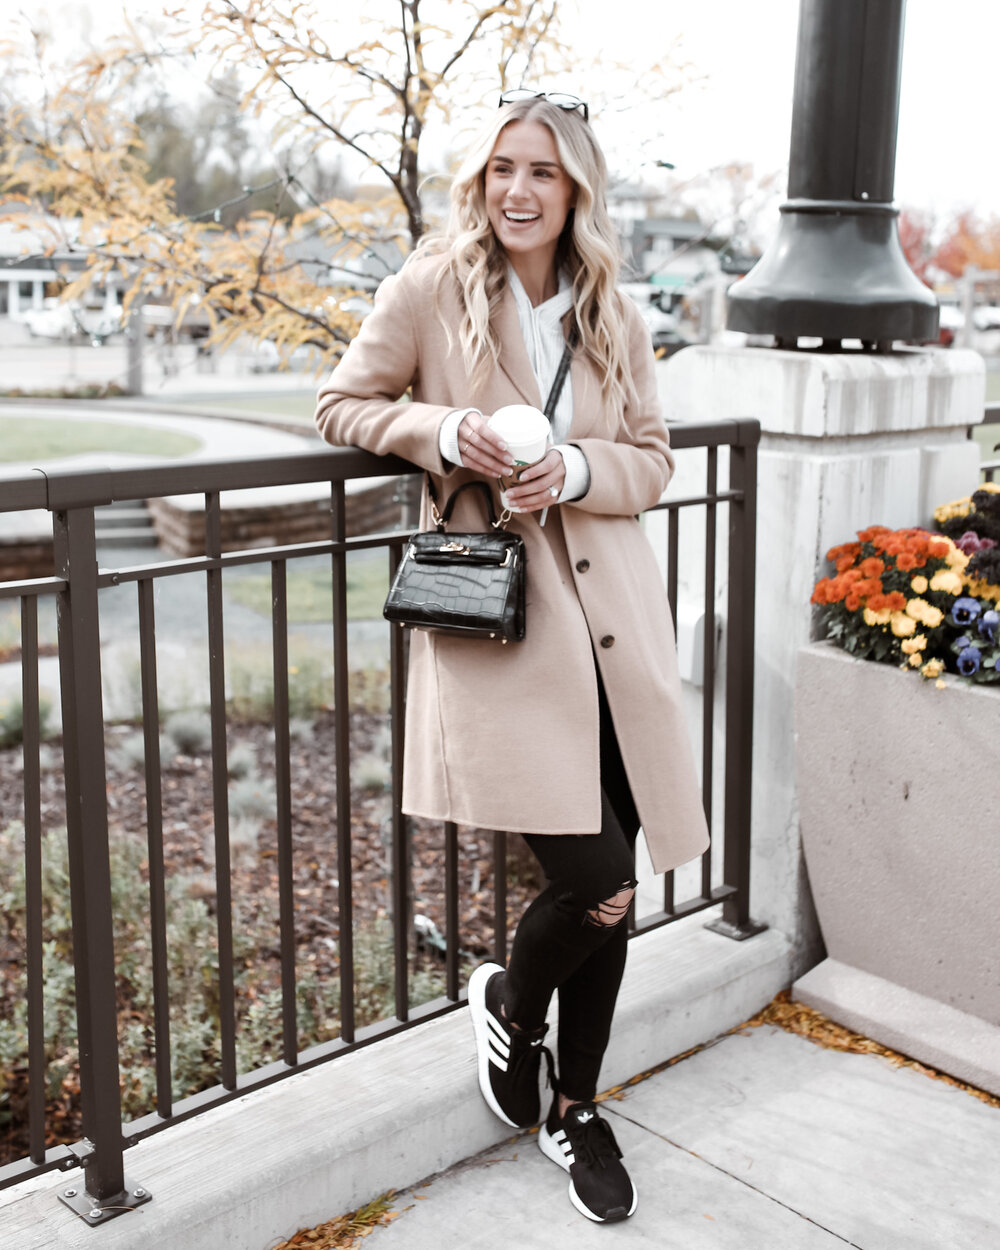
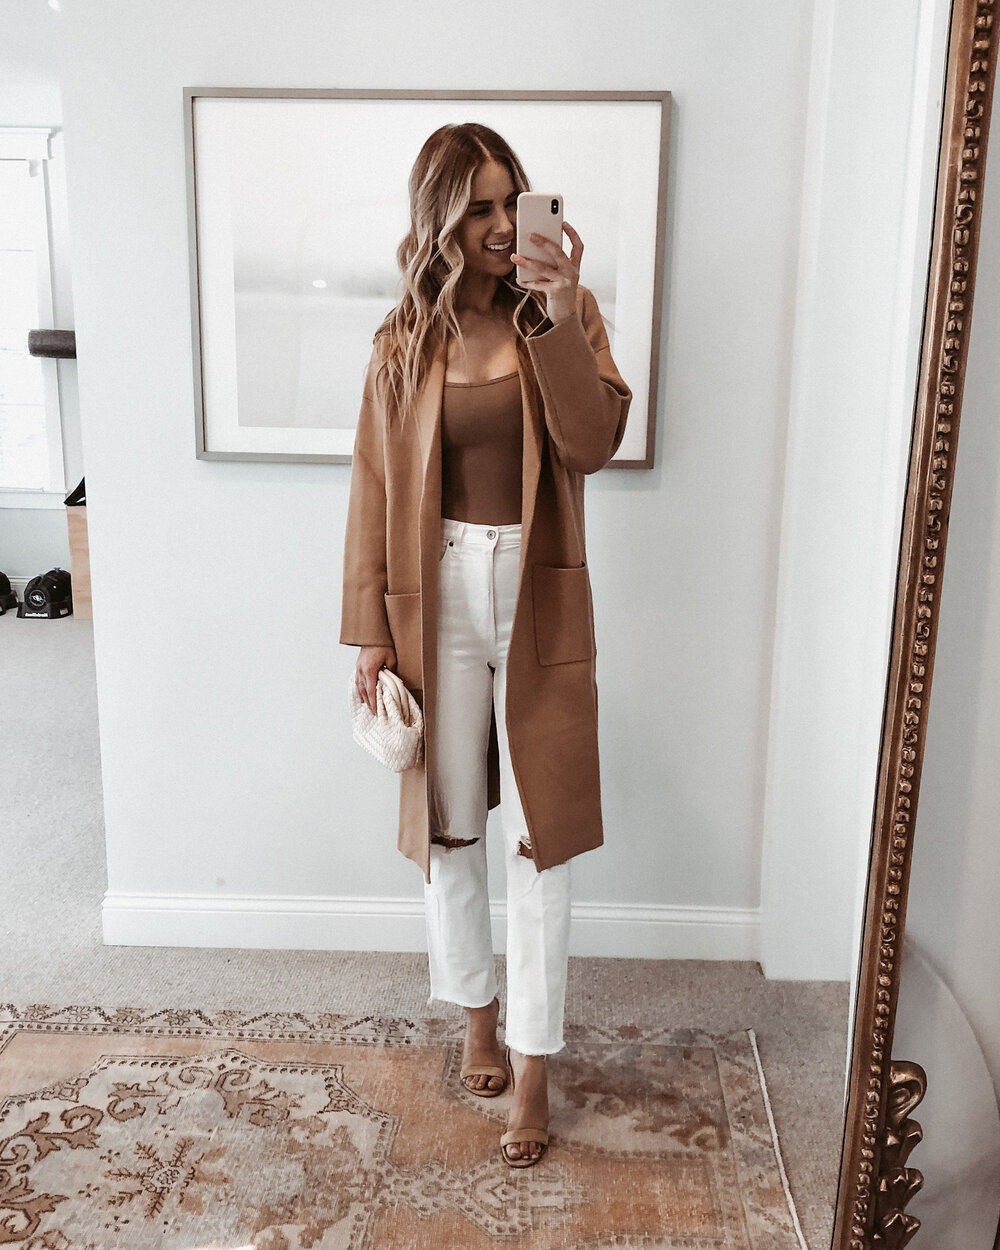
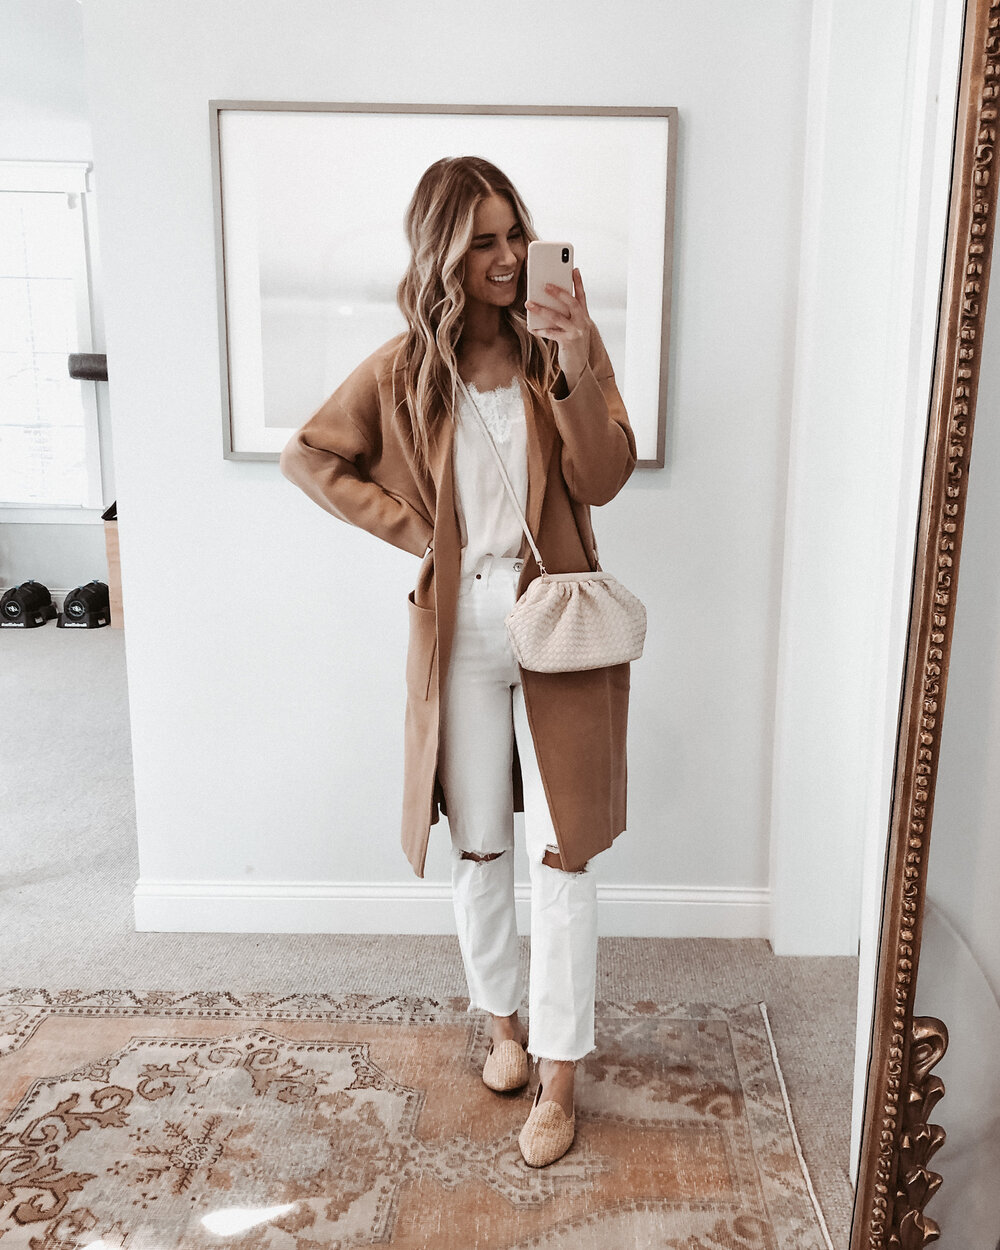
I truly love the natural colors of fall and bringing them into the home. Whether it’s with decor or in my clothes I think that Fall is the only time of year that you can really bring Mother Nature into almost all style aspects of your life. Now, that’s my opinion because I absolutely love neutrals and it seems that nature does too. In the Spring/Summer I trend towards whites + beige colors, but this time of year I darken those neutrals with camel, rich browns and caramels for the neutral pop.
I thought that you all might feel the same so I had some fun with my Instagram Reels putting together 10 neutral fall outfits, as well as looked for some new styles that would be great for Fall! If you saw my last post about some great sweaters + sweatshirts then you have already seen a few of them, but there are so many more here that you don’t want to miss!
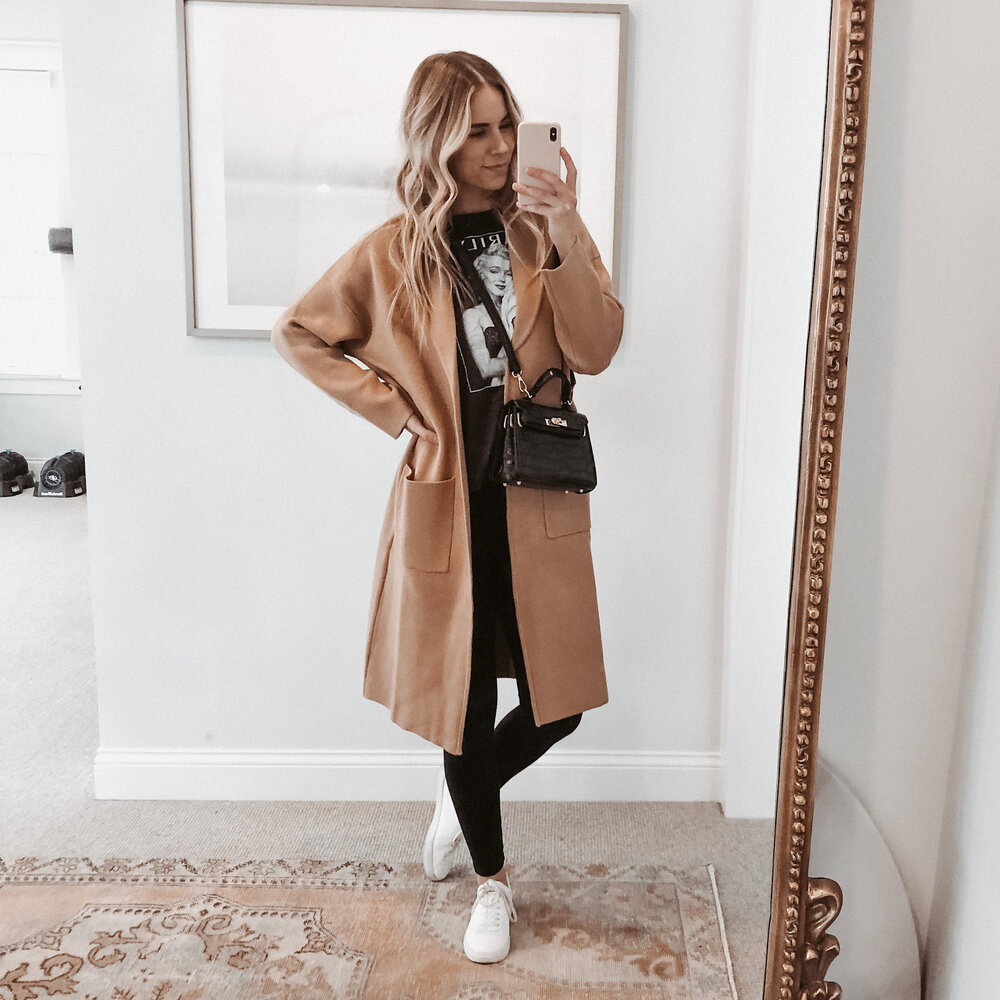
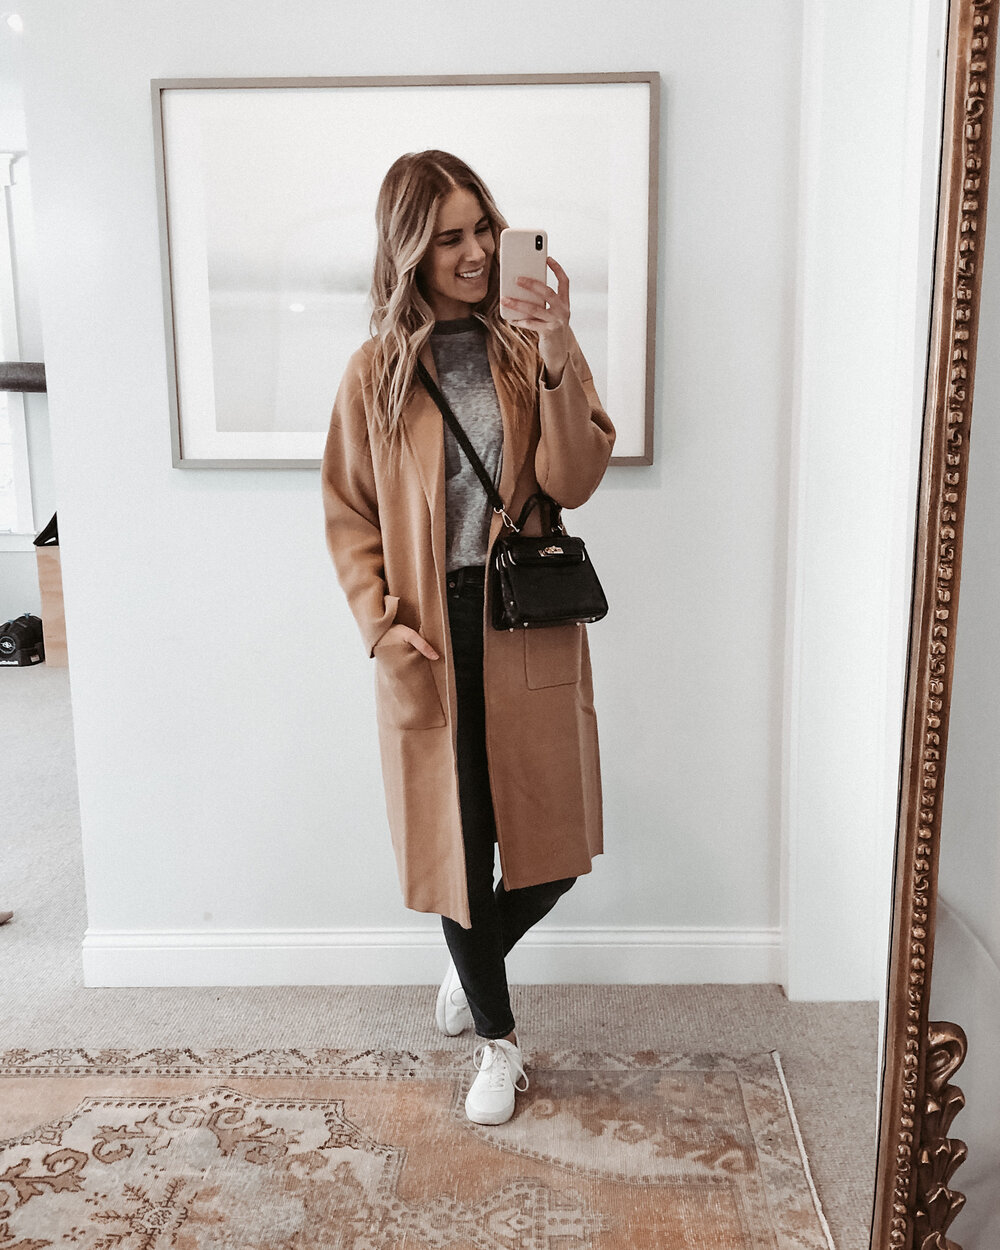
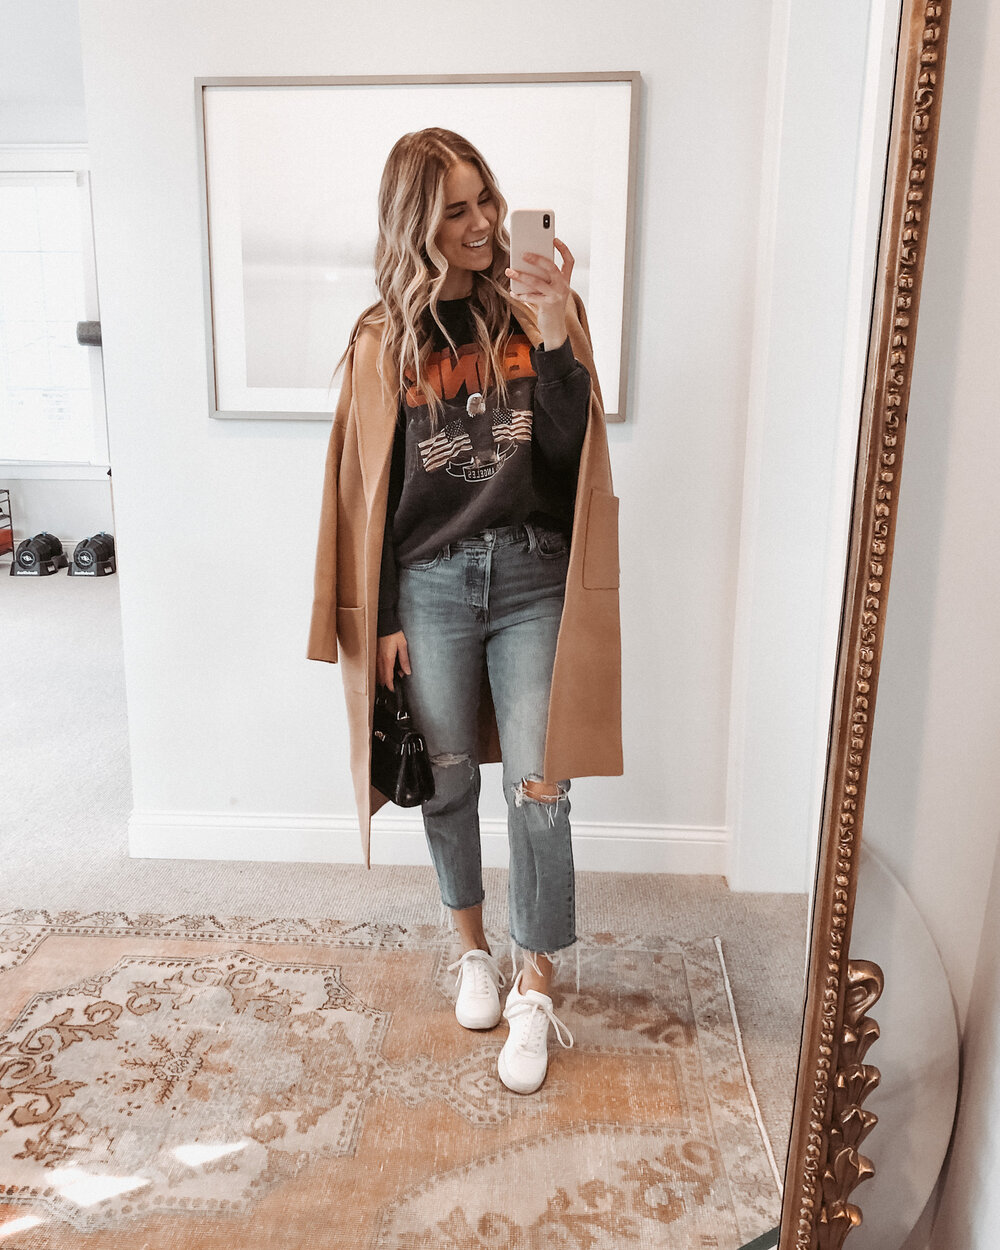
For instance, my go to coat that I think I talked about a bajillion times last year and will probably continue to do so continuously this Fall. I think that this shade of coat is perfect and can be found in tons of different styles: that Coatigan (particularly the bestsellers that you see everywhere from Mango + J.Crew) is a great option for a cozier more casual look that you can wear into Fall, but the wool topcoat that I style with everything is a great piece you can take from end of Fall when it gets really chilly into the Winter months as well. These pictures below are from last year when I was coming up with tons of different ways to wear the Coatigan, but don’t miss this post from last year of ways to wear the wool coat as well! And I’m sure if you keep an eye on my LIKEtoKNOW.it page you will be seeing them pop up with even more ways these next few months.
In the meantime check out a few of my neutral finds that you can rock this Fall no matter what activities you have going on!
I don’t know about where you live, but Fall is here. No doubt about it. We woke up the other day and had to turn the fireplace on!!! So I guess instead of easing into it, we just skipped to November…
Every year I go through my sweaters to realize either ones that are old, never been worn, will never be worn, you know how it goes. Me personally? Should not own another sweater. If I buy another one my husband might have me institutionalized :-/ But that doesn’t stop me from checking out the new ones from some of my favorite retailers OR finding new ways to wear the staple sweaters that I have now.
Those favorite retailers I mentioned?
H&M
Abercrombie
Asos
and sometimes Target
All of these in the list above have great styles and prices! I personally love H&M for the staple crew neck sweater. They have a wide range of materials, and great neutrals. Abercrombie is great for a cute, more trendy cardigan or their Soft AF sweatshirt line, which is, well, ‘soft af’ 😀 Asos is definitely for the more trendy sweaters but you can find some great deals there! I’ve seen some great sherpa jackets and I got a nice distressed sweatshirt form there last month. Target is kind of hit or miss for me, but there is definitely reason to check on what they have to offer, just in case!
STAPLE SWEATERS
I love a good neutral sweater to layer under coats. My go-to for the past year or so has been a lighter sweater or sweatshirt (think whites/light beige) under my favorite camel wool coat! From there you can pair it with jeans, booties, black jeans and mules, leggings and otk boots? So many great options!
And when you get a really good staple sweater, wearing it on its own with a pair of leggings and white sneakers and you are good to go!
STYLISH/TRENDY SWEATERS + CARDIGANS
SWEATSHIRTS + LIGHT JACKETS
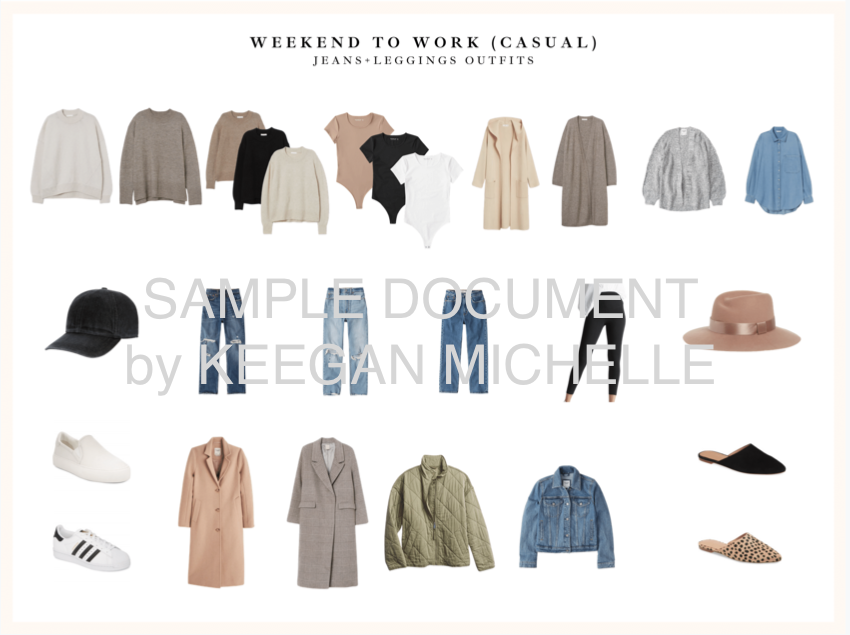
Want some ideas as to how to wear them and create a versatile fall closet? I put together a deck for a friend on fall fashion finds and one of the pages below is a great place to start! Since most people are working from home these days, I think the main focus is fall weekends, casual looks and pieces that you can wear getting errands but also style with other pieces in the event of a social outing!
If you want me to put together a deck for you or have specific fashion/style needs, fill in the form below and we can chat about me putting together something for you!
Fill in the information below and we’ll get working on your style boards!
I love the decor for this time of year! It is warm, cozy and the colors are amazing. Especially this year I have been really into greens, which is such a great compliment to neutrals. So if you’re like me and your house is full of neutrals, this is a great way to bring in a seasonal vibe as well as color in general.
Some really easy ways to incorporate Fall style into your home without spending tons of money are with:
baskets
pillows
blankets
greenery/plants
texture
candleholders
You can find amazing individual decor pieces that fit the bill, like stone textured vases or a chunky knit throw and we all know that a good candle can set the mood 😀 I’ll be putting one video up on my Instagram Reels every day with fall decor tips and the best way to use each item! And you can shop some of my fall finds here and keep an eye out for those videos to maybe be able to use something in your house that you have now!
Changes that I make? First I reset the coffee table in the living room and the throw pillows. After that if I think I need to bring out our big chunky knit blankets then I lay it on the ottoman to add some more texture. If I think I still need more then I look at what I have on the kitchen counter and the front door! Check out my post about Front Porch Fall Decor to get the outside of your home ready for the season.
We all relied on Amazon a lot before, but ever since the term “quarantine” came into our lives I think we’ve all grown to rely on it a little bit more. I know I have. And since my last post about my Recent Amazon Purchases was such a hit, I thought why not do a Summer version?
Although I have to admit, since we are back in MSP, my purchases aren’t quite as interesting. Before, we were getting settled in the apartment in Nashville so we could have a little more fun, but I don’t think you all want to see the summer fertilizer that I bought for our yard :-/ So I compiled not only some of my favorite purchases but also some of my favorite finds! The Amazon Drop has had some amazing collaborating designers like Fashion Jackson (who is one of my all-time favorite bloggers/influencers), and some other great summer styles.
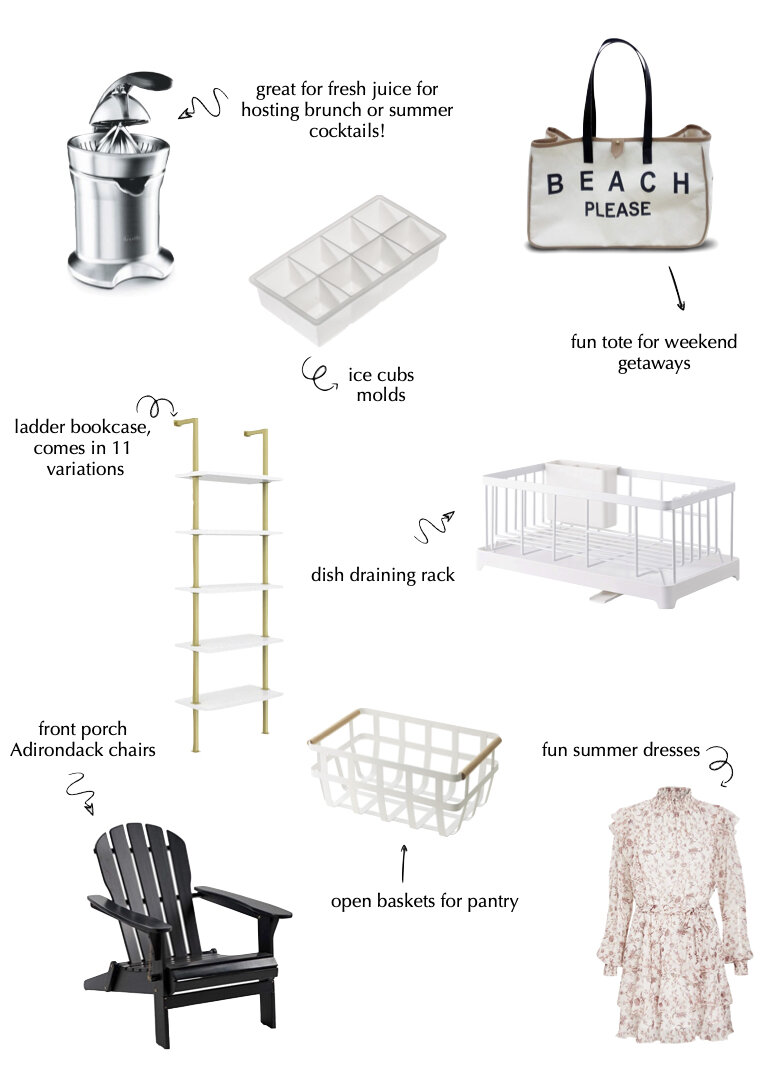
I’ve also included some other fun home finds that I know will peak your interest! I actually bought these Adirondack chairs for our front porch and absolutely love the classic look it gives our house. There are also some fun organization pieces that make me feel like a fancy adult 😛 These silicone ice molds are the ones I used for my fancy flower ice cube presentation in the Rosé Cocktails post.
But I would remiss if I didn’t highlight my newest obsession, this linen shift dress that’s not only lined (so you can’t see through it), but fun, flirty AND, wait for it… HAS POCKETS!! Oh, did I not mention that it’s only $21? Ya, you need this one.
I don’t think that I knew how much rug layering was going on in my house until recently. To be honest it just seems normal to me now, but I realized that for a lot of people, layering rugs can be daunting. And I have proof of that by seeing some of the layering that’s going on that, well, just doesn’t work. So I’ve done some research and put together some graphics to help you out, that way if you have layers in your house you can double check and make sure they’re all good, or fix them :-/
I think the biggest upside to layering rugs is the texture, color, and a element of surprise to your room! For instance say you’re wanting a little color but the idea of an 8×11 colorful rug is super daunting, this way you can still accomplish that. By having a neutral base (the larger rug underneath) you can then have a smaller, more colorful rug on top to fulfill that color that you’ve been looking for!
I also find picking the size rug for your space can be difficult at times too! So there is a huge section dedicated just to the right size and furniture orientation for reach room for your rugs.
Firstly…
you have to decide if the room of choice can even accommodate layering. Meaning, is it large enough to have two different rugs, patterns, and textures? Or will it completely overwhelm the space? Living rooms, bedrooms, large offices and front doors are great spaces for layering. We have our living room and front door layered up! But let’s say your living room is rather small, and you have large and dark furniture? If you are dead set on layering your rugs in this case, then I would recommend lighter colors and minimal (if any) patterns. But my personal preference and style would say “no”, but of course everyone’s style is different.
Let’s say you have a carpeted area? Me? I hate carpet. Hate it hate it. Our entire second floor is carpeted and if we were going to be here longer I would put hardwood floors down. So if you have a carpeted floor but want a rug, there are a few questions to answer. 1. Is the carpet a texture that would accommodate? Meaning, if it’s a long pile then the rugs would move around, fall into the carpet and just not work. But shorter and firmer carpets might. 2. How large is your carpeted space? A hallway runner? Great! A large rather open/empty room? I’m gonna say you should rethink it. If your room is medium-sized, has a good amount of furniture and the rug either covers most of it or compliments the furniture in there (specially), then sure! But throwing a small rug in the middle of a larger/open carpeted space? Just random and not a good idea. Bedrooms with carpet would work great as long as you get a rug big enough (see graph below) which is an important thing to keep in mind anyway.
secondly…
size does matter. Hahaha sorry. But it’s incredibly true when it comes to your rugs! I eluded to it a bit above when talking about a small rug in a large carpeted area, but even when there isn’t carpet you still have to be very careful as to how large/small your rug is. There is actually a home/decor blogger/influencer that I follow and absolutely LOVE. I adore her style, however I even noticed her dining room table rug is a no-go. Most of the time when picking your rug you think about how it is going to fit under the furniture in the room. Let’s break it down:
Living Room
You can either have part of the living room furniture on the rug, meaning front half or 6 inches of the couch, front legs of the chairs, etc. or you can have the entire piece of furniture fit on the rug with a little extra behind it. But make sure all the furniture can apply to this rule.
Dining Room
This one is a tricky one and tends to intimidate people when you add the element of fallen food. However it is becoming more common and softens a space making it easier for you to have a wood table on hardwood floors. However the ratio is crucial. All the chairs need to be able to be on the carpet when they are pulled out. So if the legs of the chairs fit on the rug when they are placed neatly under the table, but come off the rug the second you pull it out to sit down, no dice.
Bedrooms
Also a tricky space because a lot of homes tend to have carpeted bedrooms. So take note of the convo above about the texture of your carpet and size of your space, but if all of those boxes are checked, find a rug that fits almost completely under the bed leaving a bit of space in front of your nightstand and a significant distance past the foot of the bed. Putting a rug in the middle of the floor between the foot of the bed and furniture or a wall is just plain weird. You can add coziness another way than a rug island in your bedroom. You could also add runners on either side of the bed too!
Layering
When picking the sizes of rugs to layer, area rugs are the best way to go. Let’s talk living rooms for a second. You could do an 8×11 rug or 9×12 (depending on the size of your room) with part of your furniture sitting on it, maybe the front half or so with a smaller more decorative rug on top framing the inside of where your furniture lies. Meaning none of your furniture (except for the coffee table) touches the top rug. This is the cleanest way to do it in my opinion. But playing with the space of the top rug that is under the furniture isn’t the worst thing in the world, it will just make it look a little tighter, and busier. And you’ll lose visibility of a lot of the bottom rug. Hides are also amazing to use as a top layer on a natural rug for decoration and texture. Because hides are usually smaller they work great on larger area rugs. Much better in my opinion than having it lay alone in a larger space.
You can also angle the hide rug if you like that better. Just make sure that when you do you can move it a bit so one corner of the bottom rug isn’t more exposed than the other. might make the room feel uneven.
Doormats are the most common rugs I see layered these days, which makes sense! They are smaller, more affordable and easier in regards to the dimensions. Just find an indoor/outdoor rug, generally the 3’x5’ sizes work best and layer it under your doormat! I LOVE this because you can easily change the layers and the look for every season if you wanted to. Maybe a darker buffalo checked pattern for fall? And then a lighter striped pattern for Spring/Summer? Great options! But one thing to make sure of is that your doormat fits completely INSIDE your outdoor rug. Meaning you can see the outdoor rug (bottom layer) on all four sides of the doormat, like the graphic below. Also make sure that your doormat isn’t insanely small. Mine is from Studio McGee and 2’x3’, but I know a lot of the ones you find on Amazon are smaller. And yes, mind is on the more expensive side, but it has sat outside on our front porch for almost three years through every single bit of weather and season and still looks amazing! I’ve gotten the cheaper ones, and they fade within months. So maybe consider it an investment over time so you won’t have to replace it later.
What NOT to do…
thirdly…
Time to pick your colors and designs. My go-to is a neutral and natural base, usually a jute weave layered with a colorful vintage design. This is where you can get that pop of color in your room without overwhelming the room. Below are some great options, but start with figuring out the colors in your room! Maybe you want a hint of blue, or just accentuate the neutrals? Pick those colors and start from there!
This is also where you might decide whether or not the room can accommodate it design-wise. Sure you might be able to fit a rug in your room spatially, but would two layered rugs be too busy? Or is the room not necessarily a “cozy” one that you need to layer? I think layering rugs adds a cozy factor because of the additional material, so if your room is on the formal side I would say either just go with one rug or find the most minimal layers possible. Otherwise the designs and feels of the room might conflict with each other.
Take a look at some of the finds below that I think would go great to layer together!
BASES
TOP LAYERS
Share
oh hey!Don’t miss out!
Sign up to receive our weekly newsletter to get all the goods before it hits the blog or social media! Who knows, there might even be secrets in here that nobody else gets to know!!


